Choose Your Herbs Wisely
Understanding Common Herbs
When I first started my herb garden, I had no clue which herbs to select. So, I dove into researching some common herbs like basil, parsley, and mint. Each herb has its distinct flavor and culinary use, making it essential to know what you love eating most. You can whip up a basil pesto, sprinkle fresh parsley over your dishes, or brew some refreshing mint tea—delicious, right?
Moreover, knowing how each herb grows is crucial. Some thrive in the sun, while others prefer shade. Understanding these growing conditions ensures you set up your garden for success. So, take some time to explore and decide which herbs excite your taste buds!
Lastly, consider your local climate when choosing herbs. I live in a warmer area, so herbs like rosemary and thyme flourished in my garden, whereas some delicate herbs might need more protection in cooler regions.
Fresh vs. Dried: The Flavor Factor
I’ve found that nothing beats the flavor of fresh herbs, especially when they’re snipped straight from the garden. Fresh herbs possess vibrant flavors that dried versions can’t always replicate. When I add a sprinkle of fresh cilantro or a handful of tarragon, I can immediately taste the difference—it’s like a flavor explosion!
But if you love cooking and can’t possibly use every herb fresh, drying them for later use is a smart backup. I’ve dried basil and oregano during peak season to use when I need a flavor hit in the colder months. Just be sure to pick the right time to harvest them—before they flower is usually best!
So, think about how you like to cook and what flavors you love. This way, you’ll select the best herbs to cultivate that will enhance your dishes all year long.
Selecting Unique and Fun Herbs
Don’t be afraid to explore unusual herbs! While I love the staples like basil and parsley, I’ve found great joy in growing lesser-known gems like lemon balm and lemon verbena. They add unique flavors and aromas to my dishes, and friends are always intrigued when they sample something new at my dinner parties.
In addition, herbs like edible flowers can be stunning in salads and garnishes. I once tried growing nasturtiums; not only are they beautiful, but they also have a peppery flavor that livens up any dish!
Don’t forget to let your personality shine through your selections! If you love experimenting with global cuisines, consider herbs that play a role in those dishes, like cilantro for Mexican, basil for Italian, and dill for Scandinavian dishes.
Preparing the Right Space
Finding the Perfect Spot
When I first set out to cultivate my herbs, I spent quite a bit of time just finding the right spot. Some herbs love the sun, while others prefer indirect light. I ended up surveying my backyard and found a sunny little corner that gets about six hours of sun a day—just perfect for my garden!
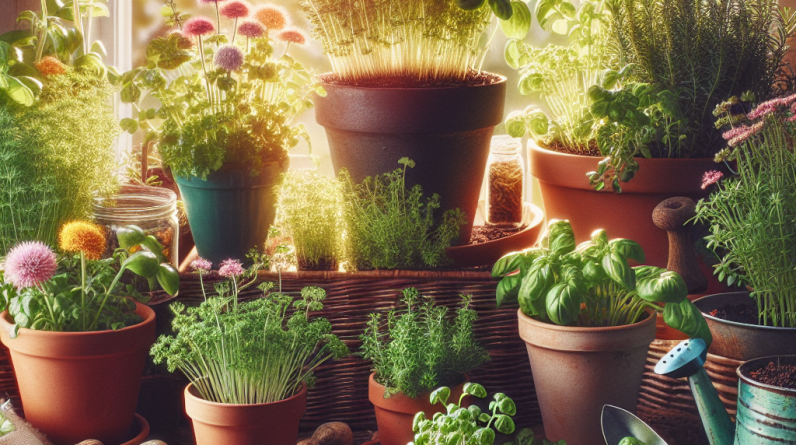
If you’re limited on space, don’t worry. You can use pots on a balcony or even a windowsill. The key is to ensure whatever herb you choose gets the right amount of light based on its individual needs.
Also, think about accessibility! I made sure my herbs were within arm’s reach of my kitchen. Nothing beats the convenience of snipping fresh herbs while cooking!
Soil Preparation
Soil is often the unsung hero in gardening. When I started, I invested in good quality potting mix, adding compost for nutrients. Various herbs have different soil preferences; for instance, I’ve noticed that herbs like basil thrive in slightly moist soil, whereas rosemary prefers a well-draining mix.
Testing the pH of your soil can be beneficial too! I grabbed a simple soil test kit from my local garden center. It gave me insights on whether I needed to make adjustments for optimal growth.
Remember, soil health translates to healthy plants, so take the time to prep it right, and you’ll notice the difference in your herb garden!
Choosing Pots or In-Ground Planting
This decision was a game-changer for me. I initially opted for pots for the flexibility—easy to move around, and if I had a rogue herb taking over, I could simply relocate it! However, I discovered that some herbs prefer the ground where they can truly spread their roots, like mint—watch out, though; it can take over!
For potted herbs, choose pots with adequate drainage holes to prevent waterlogging. I’ve accidentally drowned a few plants in my gardening journey, and it’s not a fun experience.
Ultimately, think about your space. If you have a small balcony, go for pots; if you have a garden bed, get ready to plant directly in the ground.
Caring for Your Herbs
Watering Techniques
I learned pretty quickly that each herb has its own watering needs. Some love to stay moist, while others, like thyme, prefer drier conditions. I developed a watering schedule that helps me keep a close eye on my herbs. In the hot summer months, I often check my pots every day!
A fun trick I learned is to stick my finger in the soil; if it’s dry an inch down, it’s time to give them a drink. This simple technique saves me from overwatering disasters while ensuring each herb gets the hydration it needs.
Also, consider using mulch! I found that a layer of mulch helps retain moisture and can even reduce weeds around your herbs. Less hassle for me means more time enjoying fresh flavors!
Fertilizing Wisely
Fertilization can seem daunting, but it doesn’t have to be. I started with a balanced organic fertilizer to ensure my herbs have the nutrients they need without overwhelming them. I usually fertilize once a month during the growing season to keep them vibrant and strong.
Pay attention to the leaves! If they start to yellow, that’s a sign they might need a little extra care. I’m a big fan of natural fertilizers like fish emulsion or compost tea—they’re easy to make at home and work wonders in my garden!
Always remember that over-fertilizing can do more harm than good, so err on the side of caution. Your herbs will thank you!
Pest Control Solutions
Pests can be a headache, and I’ve had my share! I’ve found that companion planting works wonders. For instance, planting marigolds with my herbs keeps pesky aphids away. Plus, those flowers are beautiful!
If you notice bugs munching on your leaves, consider using a simple soap spray made from natural ingredients. This helped me get rid of unwanted visitors without harming my plants.
Lastly, I always keep a close eye on plant health. The more I nurture my herbs, the better I get at spotting problems early on before they escalate. Prevention, my friend, is the name of the game!
Harvesting and Enjoying Your Herbs
When to Harvest
Harvesting can be a thrilling moment. I usually wait until my herbs are at least 6-8 inches tall for most. It’s essential to keep the plants healthy, so I always snip the top leaves rather than take from the base. This encourages bushier growth and more flavor.
I also learned to harvest in the morning right after the dew has dried. The flavors are at their peak, giving me the best taste when I cook.
Don’t be afraid to regularly snip! Frequent harvesting can lead to a more productive plant, making this a win-win situation.
How to Store Your Bounty
Once I’ve harvested my herbs, I love to preserve them! For soft herbs like basil and cilantro, I usually wrap them in a damp paper towel and store them in a plastic bag in the fridge. They stay fresh for quite some time this way.
For hardier herbs, like rosemary or thyme, I simply hang them upside down in a warm, dry place to dry out. I’ll then store the dried herbs in glass jars labeled with the name and date, ready for my future culinary adventures!
Experiment with different storage methods until you find what suits you best. After all, the goal is to enjoy that intoxicating aroma and flavor throughout the year.
Cooking with Fresh Herbs
The best part of cultivating my herbs is definitely using them in the kitchen! Whether garnishing dishes or incorporating them into recipes, fresh herbs elevate everything I make. A sprinkle of garden-fresh basil on pizza or a handful of dill in a potato salad takes simple meals to the next level.
I’ve also started experimenting with herb-infused oils and vinegars. Just let your favorite herbs steep in olive oil or vinegar, and voila! You have a flavorful addition for dressings or marinades.
Trying new recipes and cooking with herbs has made meal prep exciting again. I can’t wait to share my culinary creations with family and friends!
Frequently Asked Questions
1. How often do I need to water my herbs?
Watering frequency depends on the herb and environment. Always check the soil moisture; if it’s dry one inch down, it’s time to water!
2. Can I grow herbs indoors?
Absolutely! Many herbs thrive indoors on a sunny windowsill. Just ensure they get enough natural light!
3. What should I do if my herbs are wilting?
Wilting could mean they are thirsty, so check the moisture. If they seem overwatered, allow the soil to dry out before watering again.
4. How can I extend the life of fresh herbs?
Wrap fresh herbs in a damp paper towel and store them in a plastic bag in the fridge. This helps keep them fresh longer!
5. Are there any herbs that are especially easy to grow for beginners?
Yes! Basil, parsley, and chives are all great options for beginners. They’re relatively low-maintenance, and they grow quickly!


