Improve reservoir maintenance access in hydroponics by creating unobstructed service space, adding a removable light-blocking lid, and placing pumps, sensors, drains, and sample points where they can be reached without moving plants. Provide enough clearance to lift equipment vertically, route cables through labeled openings, and use an accessible drain valve or transfer pump for solution changes. Keep electrical connections above possible spill levels and preserve darkness inside the reservoir to limit algae growth. Before rebuilding the entire setup, perform a dry maintenance test: confirm that one person can inspect the solution, remove the pump, clean the container, and refill it without disturbing roots or the growing frame.
Audit the Existing Reservoir Access
Reservoir access should be evaluated by performing the actual jobs the container requires, not by judging whether its lid appears reachable. Filling, sampling, checking solution depth, removing a pump, draining, wiping interior surfaces, and retrieving a dropped fitting all demand different amounts of clearance. A narrow opening may be adequate for a pH probe yet useless when roots have wrapped around a pump intake.
Begin with the system operating normally. Identify which plants, channels, support rails, lights, hoses, or cables must be moved before the lid can open. Record every component that blocks a hand, tool, bucket, or pump. If lifting the lid pulls an air line tight or forces foliage against a lamp, the reservoir is not genuinely serviceable. Access that depends on dismantling the growing area tends to turn routine checks into postponed work.
Vertical clearance deserves particular attention. Submersible pumps usually must be lifted above the solution and then cleared over the reservoir rim. A lid mounted beneath a fixed growing tray may open several inches but still prevent pump removal. Test the complete extraction path with the pump, tubing, filter, and power cord attached. Where overhead space is limited, a sliding access panel can be more practical than a large hinged lid.
Reach distance matters as much as opening size. A deep container pushed against a wall may provide a broad top opening while leaving its rear corners impossible to scrub. For a simple reality check, place a clean cloth in each interior corner and try to retrieve it without climbing over the frame. If the task requires unsafe stretching, rotating the reservoir or placing it on lockable supports may solve more than enlarging the lid.
Create a short obstruction record before buying hardware. Note the lid opening, pump-removal route, drain access, wall clearance, cable slack, and spill hazards. Photographing the installed arrangement can reveal crossed hoses or buried electrical connections that are easy to miss at close range. This audit gives the retrofit a defined purpose and prevents an attractive modification that fails during the first full cleaning.
Create Clearance Without Exposing the Nutrient Solution
Useful service clearance must be balanced against the need to keep light, debris, and warm room air away from the nutrient solution. Removing the lid permanently makes access easy, but it also invites algae, fallen leaves, evaporation, and contamination. The better approach is to separate the structural plant support from the service opening whenever the system design permits.
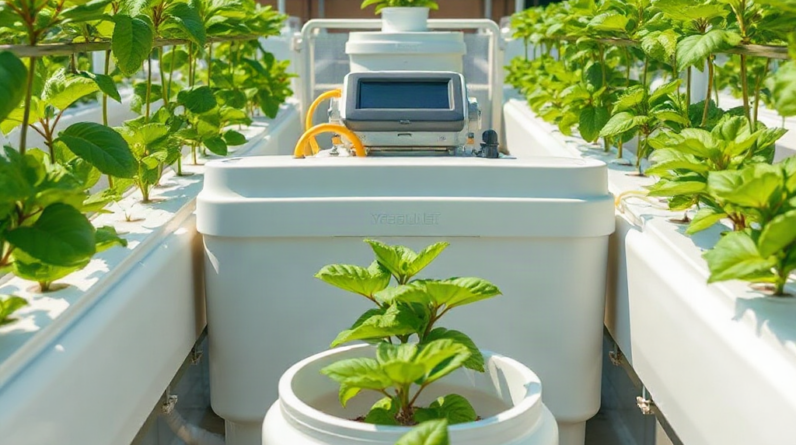
A removable opaque panel works well when the reservoir sits beneath a rack or growing channel. The panel should be large enough for a forearm, cleaning pad, and installed pump to pass through without scraping. It should also overlap or seal its opening so direct light cannot enter around the edges. Thin panels that sag into the solution or become brittle under grow lights are poor long-term choices; choose a rigid, moisture-tolerant material compatible with the reservoir environment.
Hinged lids are convenient only when they have a clear swing path and can remain safely open. A hinge installed against a wall may trap the lid at a low angle, while a front hinge can place the open panel directly in the operator’s working space. A lift-off lid avoids hinge constraints but needs a clean place to be set during service. In a compact grow tent, two smaller interlocking panels may be easier to handle than one full-width cover.
Do not enlarge an opening without checking whether the lid braces the container walls. Some plastic reservoirs bow outward when filled, and cutting away too much material can weaken the rim. It is often safer to replace a separate lid or fabricate a fitted cover than to cut the reservoir body. Any drilled or cut edge should be smooth enough that it cannot damage tubing, cables, gloves, or skin.
Leave working clearance around the outside as well. A reservoir that slides forward for cleaning can conserve growing space, provided its platform supports the full filled weight and cannot roll unexpectedly. Use stops or locking casters, allow slack in hoses without creating low loops that trap solution, and disconnect anything that could be pulled loose. Guidance on improving reservoir maintenance access in hydroponics should always treat movement, containment, and light exclusion as one design problem rather than three unrelated upgrades.
Reposition Plumbing, Pumps, Sensors, and Power
Serviceable components are arranged by maintenance frequency and removal path. Solution-level indicators and sampling points need frequent access, while bulkhead fittings may be touched only during deep cleaning. Putting every connection on the same crowded side creates tangled tubing and makes a small leak difficult to identify.
Place a sampling port near the normal working position so readings do not require lifting the entire lid. The sample should represent the mixed reservoir rather than a stagnant corner or the concentrated stream immediately beside a nutrient return. A dedicated cup or syringe can reduce the chance of introducing residue from other containers. Sensors left in place should be mounted where they remain submerged at the lowest intended operating level and can be removed without pulling on their cables.
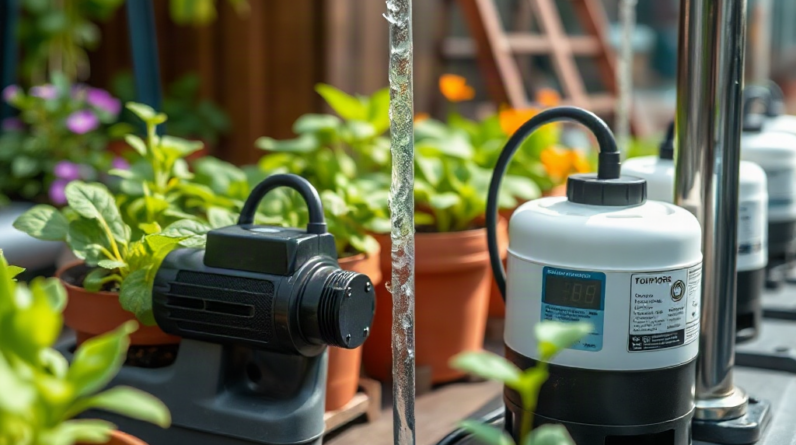
Pumps need enough slack for removal, but excess hose can kink, trap sediment, or interfere with the lid. Quick-disconnect fittings may simplify pump service if they are suitable for the tubing and installed where drips can be contained. Shutoff valves can isolate an external line, yet a closed valve must never be forgotten when the pump restarts. Labels showing normal valve positions are more reliable than expecting every operator to remember the plumbing state.
Draining through a low, reachable outlet generally removes more old solution than siphoning from above. A drain valve must be protected from accidental impact and should discharge into a hose or container without requiring a hand beneath the fitting. If adding a low outlet would risk a leak or require unsafe drilling, a dedicated transfer pump is a reasonable alternative. The tradeoff is that the pump and its hose must be cleaned, stored, and kept available.
Electrical access requires a separate route from wet maintenance work. Keep plugs, power strips, and adapters elevated beyond likely splash and overflow zones, and form drip loops where appropriate. Do not defeat grounding or equipment protection supplied by the manufacturer. Label pump, aerator, heater, and sensor cords at both ends so the correct device can be isolated before reaching into the reservoir.
A common mistake is securing cables and tubing so tightly that the installation looks orderly but cannot be serviced. Use releasable supports and preserve enough movement to open the panel and lift equipment. After rearranging components, verify that no hose rubs against a sharp edge and no cord carries the weight of a pump or probe. These details determine whether reservoir maintenance access remains practical after weeks of daily operation.
Apply the 7-Point Reservoir Retrofit Plan
A staged retrofit limits downtime and exposes conflicts before permanent holes are drilled. Emptying and cleaning the reservoir first provides a clear view of wall shape, structural ribs, existing penetrations, and sediment-prone areas. Never drill or cut a container while it holds nutrient solution or remains connected to energized equipment.
- Map every service task. Mark where solution is sampled, water is added, equipment is removed, and waste solution exits.
- Choose the operator position. Establish one stable place from which the lid, valves, and controls can be reached without leaning over plants.
- Separate support from access. Prevent trays, net-pot panels, or channel frames from relying on the service panel whenever practical.
- Fit an opaque opening. Use a removable, sliding, or hinged panel that blocks light while permitting pump and tool clearance.
- Organize wet connections. Group drains and detachable plumbing where small spills can be captured and observed.
- Raise and label electrical connections. Route cords away from the opening and identify each device at the plug and reservoir ends.
- Run a dry maintenance rehearsal. Simulate checking, draining, component removal, wiping, and refilling before returning plants to position.
The order matters. Choosing a new lid before deciding where the operator stands often puts the handle beneath foliage or sends the panel toward a wall. Likewise, adding a drain before planning the collection container can leave the valve too close to the floor for a bucket or positioned where a hose must cross a walkway.
A small deep-water culture container may need only a split opaque lid and a labeled cord route. A larger recirculating installation may benefit from a dedicated service aisle, external shutoff points, and a transfer connection. More fittings are not automatically better: every added bulkhead or valve creates another possible leak path. Add hardware only when it removes a recurring maintenance obstacle and remains visible enough for inspection.
Budget upgrades should prioritize clearance and safe isolation over cosmetic organization. A correctly sized removable panel and a stable reservoir base can have more operational value than an elaborate manifold hidden behind the system. Before committing to a modification, ask whether it reduces the number of items moved, shortens exposure of the open reservoir, or makes a fault easier to see. If it does none of those things, it may merely relocate clutter.
Test Access Under Real Maintenance Conditions
A retrofit is successful only when routine service can be completed without disturbing roots, stressing plants, or creating new spill and electrical hazards. Test it first with the system empty, then repeat the key motions after refilling because filled tubing, wet components, and operating cables behave differently.
Time is not the only measure. Watch whether the operator can maintain a stable stance, keep removed parts over a washable surface, and see the reservoir bottom with a light held outside the opening. Confirm that a pump can be lifted without snagging roots or dragging residue across the growing deck. The lid should return to its correct position without pinching air lines or sensor leads.
Signs of effective access include regular inspection without moving plants, clean sampling, visible fittings, and full drainage into a controlled container. Warning signs include wet plugs, strained tubing, unexplained drips, lid gaps admitting light, or maintenance that still requires a second person to hold equipment. Condensation or green growth around an opening suggests the new cover is not excluding light or sealing as intended.
Use the first solution change as a commissioning test. Isolate electrical equipment, drain through the planned route, remove the pump and sensors, clean all reachable surfaces, inspect seals, and refill. Record any step that requires improvised tools or temporary balancing of the lid. Those inconveniences usually become skipped tasks later, so correct them while the layout is still fresh.
Recheck the installation as plants mature. Roots can occupy the pump-removal path, foliage can block a previously open panel, and loaded growing channels may reduce frame clearance. Seasonal room changes can also affect condensation and reservoir temperature. A monthly access check can be brief: inspect lid fit, cable condition, hose movement, valve dryness, and the clear path to the service opening.
Maintenance access should remain simple enough for the person who actually operates the garden, not merely the person who built it. Clear labels and a predictable shutdown sequence are especially useful when several people share care duties. Treat improved reservoir maintenance access in hydroponics as an operational feature that must continue working as roots, equipment, and crop canopies change.
Frequently Asked Questions
How much space should be left above a hydroponic reservoir?
Leave enough vertical space to remove the tallest installed component, usually the pump with its fittings attached. Test the extraction path rather than relying on a fixed clearance measurement.
Is a hinged or removable reservoir lid better?
A hinged lid suits installations with an unobstructed swing path and secure open position. A removable or sliding panel is usually easier beneath low trays or beside walls, provided it has a clean storage position.
Can I cut a larger access hole in an existing lid?
Often, but first confirm that the lid braces the reservoir and that cutting will not weaken its rim. Smooth every edge and fit an opaque cover that keeps light and debris out.
What is the safest way to make reservoir draining easier?
Use a protected low drain connected to a controlled discharge hose, or use a dedicated transfer pump when adding a bulkhead could compromise the container. Keep electrical connections above the wet work area.
How can I tell whether the retrofit worked?
Perform a complete solution change. You should be able to isolate power, sample, drain, remove equipment, clean, inspect, and refill without moving plants or improvising support for lids and hoses.
Conclusion
Effective reservoir access is measured during maintenance, not during installation. Start by mapping every hand, tool, hose, and component movement required for a full solution change. Then create a light-blocking service opening, preserve a clear pump-removal path, position the drain where discharge can be controlled, and separate elevated electrical connections from wet work.
Make only modifications that remove a documented obstruction. Extra valves and fittings can simplify service, but they also introduce joints that require inspection. Complete a dry rehearsal before restarting the garden, then repeat the test with the reservoir operating. If mature roots, plant growth, or tight cable routing begins to obstruct the opening, adjust the layout promptly. A reservoir that stays reachable is easier to inspect thoroughly, clean on schedule, and operate without unnecessary disruption to the crop.