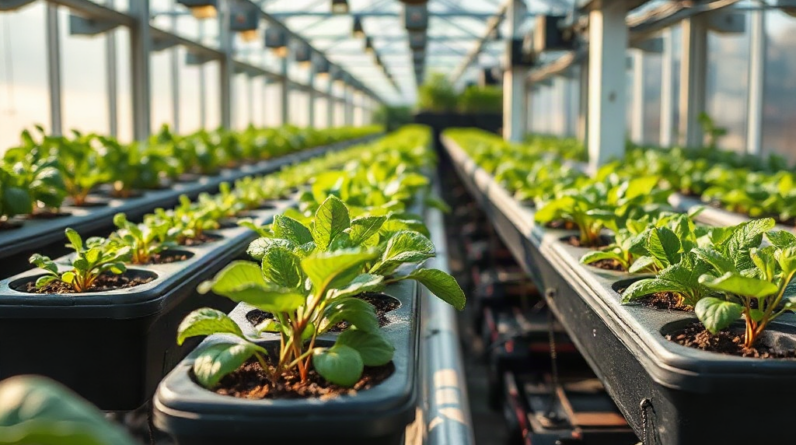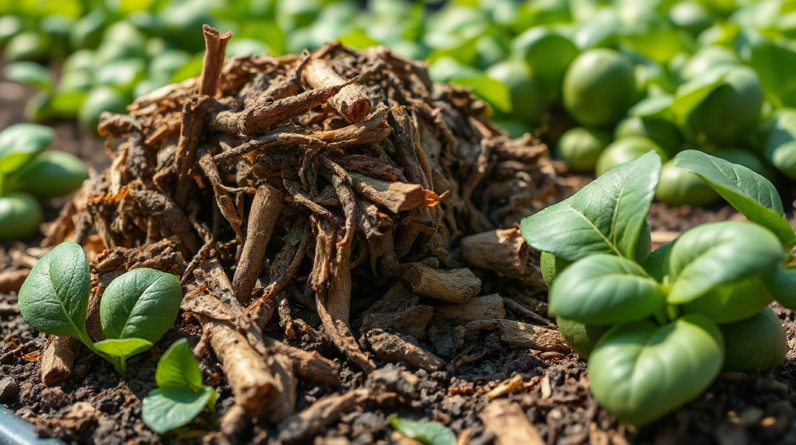
Composting spent hydroponic plant material works when roots, stems, leaves, and growing media are separated from contaminants, chopped, balanced with dry carbon, and kept aerated until the pile matures. Remove plastic, clips, wires, diseased tissue, and any media that may contain synthetic fibers or chemical residues before adding plant matter. Excess nutrient solution can make a pile wet and odorous, while a large mass of fine roots can compact and restrict airflow. Mixing the material with dry leaves, shredded cardboard, or wood chips improves structure, and finished compost should be dark, earthy-smelling, and free of recognizable plant pieces before garden use.
What Belongs in a Hydroponic Compost Pile
Spent leaves, stems, roots, and soft vines are generally suitable compost ingredients when they are free from disease concerns and noncompostable equipment. Hydroponic plants are still biodegradable organic matter, but their production history changes how they should be sorted. The material may carry wet root debris, mineral residue, clips, plastic netting, foam plugs, or pieces of an artificial growing medium. Separating those items before composting prevents a useful soil amendment from becoming a mixture of persistent waste.
Green plant tissue supplies relatively nitrogen-rich material, while dry leaves, shredded untreated cardboard, straw, and small wood chips contribute carbon and physical structure. A pile made entirely from succulent stems and roots often collapses into a dense, wet layer. That condition limits oxygen and encourages sour odors. By contrast, adding coarse dry material creates air spaces that allow aerobic organisms to break down the plant tissue more evenly.
A small indoor rack garden may produce only a bucket of lettuce roots and leaves at a time. That amount can be mixed into an existing outdoor pile rather than composted alone. A larger harvest from fruiting plants should be cut into shorter pieces and distributed through several layers. Avoid placing one thick mat of roots in the center; tangled roots can behave like a moisture-holding blanket and remain recognizable long after the surrounding material has decomposed.
A useful sorting rule is simple: compost clean plant matter, recycle or discard equipment separately, and treat suspicious material as a safety decision rather than a volume problem. Composting spent hydroponic plant material is most successful when the pile receives a clean, physically manageable feedstock from the beginning.
Preparing Roots, Stems, Media, and Nutrient Residue
Preparation determines whether the pile receives a balanced mixture or a compacted mass. Shake or rinse roots only when doing so is practical and environmentally responsible; the goal is to remove loose media and excess solution, not to wash large quantities of nutrient water into a drain or waterway. Let very wet material drain briefly, then cut thick stems and root bundles with clean pruners. Smaller pieces expose more surface area to decomposers and distribute moisture more evenly.
Growing media requires separate judgment. Coco coir, peat-based plugs, and some bark products are organic and may break down, although they can alter the pile’s moisture and texture. Expanded clay pellets, rockwool, perlite, plastic-based mats, and synthetic starter materials should not be assumed compostable. Rockwool and plastic do not belong in an ordinary home compost pile simply because they were attached to a plant. Check the material label or manufacturer information; when its composition is uncertain, keep it out of the finished compost.
Residual fertilizer solution is usually not a reason to discard healthy plant tissue, but saturated material can make the pile too wet. A short draining period followed by generous mixing with dry carbon is more useful than adding more green waste. Do not pour concentrated nutrient solution directly onto a compost pile. Dispose of unused solution according to the product label and local wastewater guidance, particularly when it contains additives beyond ordinary mineral nutrients.
Compare two common approaches: adding intact harvest debris immediately versus preparing it first. The first is faster but more likely to create wet pockets, visible root balls, and hidden plastic contamination. The second takes a few minutes and produces a more uniform feedstock. Before loading the pile, remove labels, tie material, plant clips, emitters, net pots, and foam. Check the bottom of root masses for embedded pellets or fibers, then combine the cleaned material with dry leaves or shredded cardboard.
Building and Managing the Pile
A productive pile needs moisture, oxygen, a workable carbon-to-nitrogen balance, and enough volume for biological activity. Hydroponic debris usually supplies abundant moisture and nitrogen, so the most useful amendment is often dry, coarse carbon rather than another green ingredient. Mix the plant material instead of layering it as a solid sheet. The finished blend should feel damp when squeezed, with little or no free liquid running from it.
Begin with a loose base of twigs, coarse leaves, or wood chips to encourage airflow. Add a thin layer of chopped plant residue, then cover it with dry carbon. Repeat those layers while occasionally mixing with a fork. If roots are especially dense, break them apart by hand or with pruners before incorporation. A covered bin can retain heat and moisture, but it still needs ventilation; a sealed container is more likely to become anaerobic and foul-smelling.
Monitor the pile by observing physical signals rather than relying on a fixed calendar. Warmth, gradual settling, reduced plant-piece visibility, and an earthy smell indicate active decomposition. A sharp rotten odor, slimy texture, or clouds of flies point toward excess moisture or poor airflow. Turn the pile to expose compacted zones and add dry leaves or shredded cardboard. If the material is dusty and unchanged, add a modest amount of water while mixing; flooding it is harder to correct than starting slightly dry.
Small batches present a real constraint. A single container of roots may not generate enough heat to decompose quickly, so it can be blended into a mature pile or a community compost stream that accepts plant residues. Hot composting can reduce some weed seeds and many ordinary plant pathogens when the entire mass reaches appropriate composting conditions, but a home gardener should not assume that every section of an uneven pile received the same treatment. Turning and thorough mixing matter more than claiming a temperature the pile was never measured to reach.
- Too wet: add dry, bulky carbon and turn the pile.
- Too compact: break up root mats and add coarse material.
- Too dry: moisten gradually while mixing rather than soaking the surface.
- Slow but odor-free: check batch size, particle size, and the proportion of woody material.
Disease, Chemical, and Contamination Decisions
Healthy spent plants are the easiest feedstock to compost; plants removed because of serious disease require more caution. Wilting alone does not identify a composting risk, because hydroponic plants can decline from root damage, nutrient imbalance, heat, or irrigation failure. Moldy tissue, spreading root rot, insect infestations, or a known soilborne or waterborne pathogen create uncertainty about whether a home pile will reach consistent pathogen-reducing conditions.
Do not compost diseased material merely to avoid waste. A cool or poorly mixed pile may preserve viable organisms, and returning immature compost to a hydroponic system can spread problems through shared tools, reservoirs, or handling surfaces. The safer choice may be disposal through a municipal organics program that specifies how plant disease waste is handled, or sealed disposal where local rules require it. Clean pruners, trays, and work surfaces after processing suspect plants, and keep questionable residues away from healthy seedlings.
Chemical history also matters, but fertilizer residue should not be confused with persistent pesticide contamination. Standard nutrient salts are not a blanket guarantee that every growing input is appropriate for compost or food gardens. Products may include disease-control agents, insecticides, growth regulators, or other additives with label-specific disposal instructions. Read the labels for treatments used on the crop and follow local waste guidance rather than assuming composting neutralizes them.
Another frequent mistake is treating a “clean” appearance as proof of safety. A root ball can look harmless while containing plastic fibers, foam, or a concentrated wet pocket. Conversely, a lightly mineral-stained stem from ordinary nutrient solution is not automatically hazardous. Make the decision based on what was applied, what the material contains, and where the finished compost will be used. When the history is unknown, use the compost for ornamental beds rather than edible crops only if that choice is consistent with local guidance, and exclude material with a credible disease or chemical concern altogether.
Using Finished Compost in the Garden
Finished compost should have a dark, crumbly appearance, an earthy smell, and few recognizable roots or stems. It may still contain small fibrous pieces, but it should not feel hot in the center or generate a strong ammonia or sour odor. Immature compost can continue decomposing after application, temporarily competing for oxygen and nitrogen near plant roots. Letting it mature longer is preferable to spreading a questionable batch around tender vegetables.
Screening is useful when hydroponic debris included small fragments of media. Pass the material through a coarse garden sieve and return unfinished pieces to the active pile. Pick out pellets, fibers, tape, and plastic by hand. This extra inspection is especially worthwhile before using compost in containers, where a few nondegradable fragments are more noticeable and can interfere with drainage.
Use the finished material as a soil amendment rather than treating it as a complete fertilizer or a replacement for a hydroponic nutrient solution. Mix a modest amount into garden soil or use it as part of a broader potting blend suited to the crop. Seed-starting media require a finer, more predictable texture than a home compost pile usually provides. Compost also does not correct every soil problem; a heavy, salty, or poorly drained bed may need separate testing and management.
Keep records for recurring grows. Note which plants entered the pile, whether any treatments were used, what carbon material was added, and whether the batch developed odors or retained plastic. Those observations make the next cleanup more efficient. Gardeners who want a closed-loop system may be tempted to return compost to the same hydroponic setup, but compost belongs in a managed soil or outdoor growing context unless the system is specifically designed and monitored for that input. Composting spent hydroponic plant material reduces organic waste most reliably when the output has a clearly defined, appropriate use.
Frequently Asked Questions
Can roots from hydroponic plants go into compost?
Yes, roots from healthy plants can usually be composted after loose media, plastic, and excess solution are removed. Chop tangled root masses so they do not form airless mats.
Should rockwool be composted with plant debris?
No. Rockwool is not an ordinary biodegradable compost ingredient. Remove it from the roots and follow local disposal or recycling options where available.
How can wet hydroponic waste be balanced?
Drain free liquid, chop the plant matter, and mix it with dry leaves, shredded untreated cardboard, straw, or small wood chips. Turn the pile if it becomes compacted or develops an odor.
Can diseased hydroponic plants be composted?
Home composting is not a dependable treatment for every plant disease. Exclude material with a known serious disease or use a waste program that specifically handles diseased plant residues.
When is the compost ready to use?
Use it when the pile is cool, earthy-smelling, crumbly, and mostly free of recognizable plant pieces. Screen out media fragments and return unfinished material to the active pile.
Further Reading
Authoritative Sources
- Composting at Home
epa.govExplains basic home composting conditions, acceptable materials, moisture, and management considerations
- Composting at Home
extension.umn.eduProvides practical guidance on balancing organic materials, aeration, moisture, and finished compost
- Composting
extension.oregonstate.eduOffers university extension guidance for managing compost piles and recognizing decomposition problems
Conclusion
Good compost begins with disciplined sorting, not with the pile itself. Keep healthy leaves, stems, and roots; remove net pots, plastics, rockwool, foam, and other artificial media; and separate any material with a credible disease or chemical concern. Chop dense roots, balance wet green debris with dry carbon, and maintain airflow so the mixture decomposes aerobically. Judge readiness by texture, smell, temperature, and the disappearance of recognizable pieces rather than by age alone. Finished compost is best used as a soil amendment in an outdoor bed or suitable container mix, not as a substitute for a controlled hydroponic nutrient solution. Record what entered each batch, inspect the finished material, and use the next cleanup cycle to correct whichever issue—excess moisture, compaction, or contamination—appeared first.