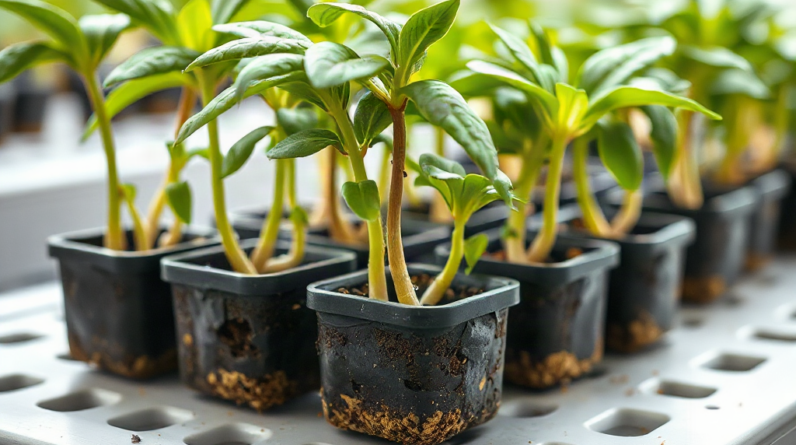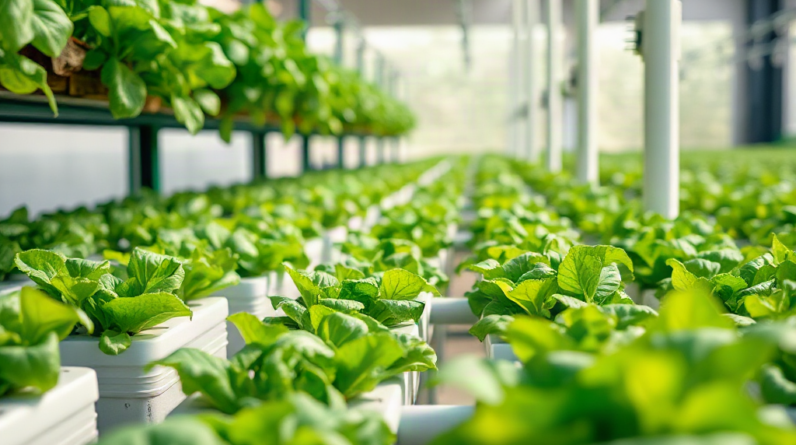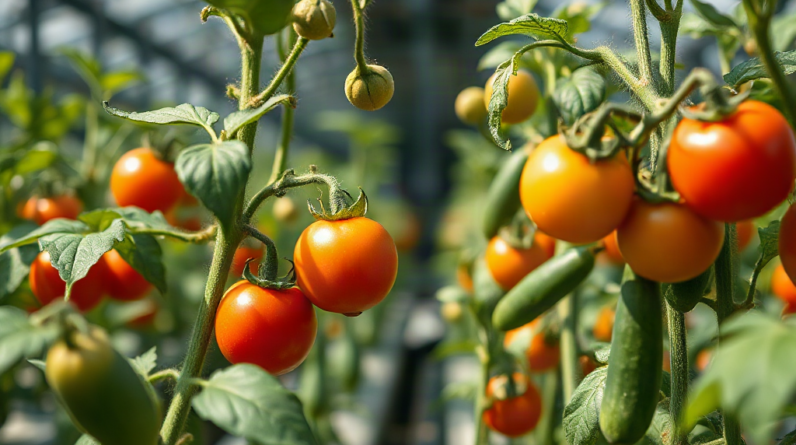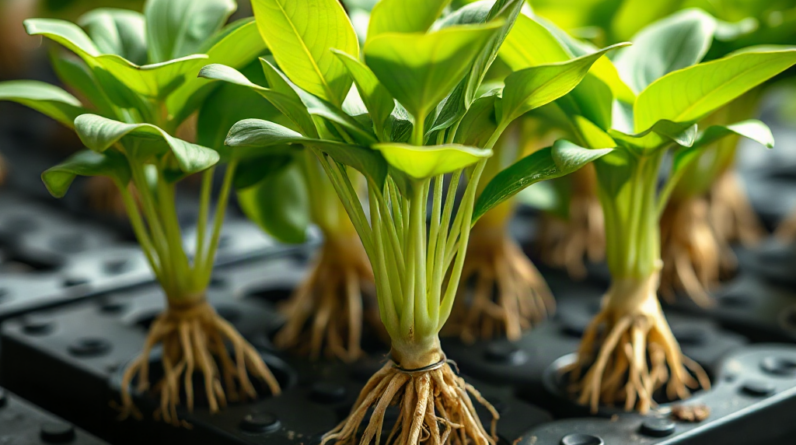
Hydroponic plants are ready for transplanting when they have several true leaves, a compact network of pale roots, and enough stem strength to remain upright without stretching or collapsing. Roots should hold the starter plug together but should not be densely circling, discolored, slimy, or badly tangled with neighboring seedlings. Readiness varies by crop and destination, so judge root development, leaf growth, plug moisture, and environmental conditions together rather than transplanting by age alone. Move seedlings before they become root-bound, handle them by the leaves or plug instead of the stem, and place exposed roots into moisture promptly to limit transplant stress.
Read the Leaves, Stem, and Growth Pattern
Leaf development provides a better transplant signal than the number of days since germination. The first leaves that emerge are cotyledons, which supply stored energy but do not show that the seedling has established mature growth. Wait until true leaves appear and begin expanding in the characteristic shape of the crop. Lettuce may be manageable with two or three true leaves, while tomatoes, peppers, and other larger fruiting plants generally benefit from a more developed shoot and root structure before being moved.
Stem quality matters as much as leaf count. A suitable seedling should stand upright and carry its leaves without leaning sharply, pinching at the base, or folding under gentle movement. A long, thin stem usually signals insufficient light or excessive distance from the fixture. Transplanting does not correct that weakness. The plant may topple in a net pot, remain unstable in loose media, or expose part of its root zone as it moves.
Compact growth is usually preferable to rapid vertical growth. Consider two basil seedlings of the same age: one has a short stem, three sets of true leaves, and roots visible along the plug; the other is taller but has only one true leaf pair and a threadlike stem. The shorter seedling is normally the stronger transplant candidate. Calendar age would treat them as equals, but their structures show otherwise.
Check the growing point as well. New leaves should be forming without severe twisting, bleaching, dead margins, or stalled growth. Minor color differences can reflect lighting or cultivar traits, but widespread yellowing before transplant suggests that the seedling environment, moisture level, or nutrition needs attention. Moving a declining plant into a larger installation can make diagnosis harder because multiple conditions change at once.
A practical shoot-readiness check includes three observations:
- True leaves: More than the initial seed leaves are open and actively growing.
- Stem control: The plant remains upright during light handling or airflow.
- Balanced proportions: Leaf growth, stem thickness, and plant height look proportionate rather than stretched.
These signs establish above-ground readiness, but they are not enough by themselves. The next step in deciding when hydroponic plants are ready for transplanting is confirming that the roots can tolerate the move.
Inspect Roots Without Damaging the Seedling
A transplant-ready root system has spread through the starter material enough to keep moisture available after the move. In a foam cube, fiber plug, or rockwool cube, several roots may be visible at the sides or bottom. They do not need to form a thick curtain. A few branched roots distributed through the plug are more useful than one unusually long root extending from an otherwise undeveloped seedling.
Healthy young roots are commonly pale cream to white, although media staining and nutrient solutions can change their appearance. Texture and odor provide valuable context. Firm roots with no sour smell are encouraging; slippery tissue, easy breakage, dark soft patches, or an unpleasant odor indicate damage or low-oxygen conditions. Brown color alone is not a conclusive diagnosis because some nutrients and organic inputs stain roots. Look at color, firmness, smell, and recent growth together.
Inspect plugs gently rather than pulling seedlings out to count roots. Lift the plug by its edges and look at openings on the bottom and sides. If roots have grown into a shared tray, separate them before they weave together extensively. Pulling intertwined seedlings apart can strip fine root hairs and create wounds. When two plants are inseparable, sacrificing the weaker seedling may protect the stronger one better than forceful separation.
The starter plug should remain intact during transfer. If it crumbles as soon as it is lifted, the roots may not yet bind it sufficiently, or the material may be too dry. Conversely, a plug wrapped in a dense root mat has been held too long. Overgrown roots can be difficult to thread through a net pot, and circling roots may continue growing in a restricted pattern. Transplanting slightly before that stage usually causes less physical damage.
Moisture can distort the assessment. A saturated plug may hold together even when root growth is sparse, while a severely dry plug can separate despite adequate development. Check after the plug has drained but before it dries. Never squeeze it to test root density; compression reduces pore space and can injure both roots and stem.
Root length is not a universal requirement. In deep-water culture, roots may soon reach aerated solution, whereas an ebb-and-flow tray may rely on moisture retained in the plug and surrounding media between cycles. The correct question is whether the roots can remain moist and oxygenated in the intended setup, not whether they have reached an arbitrary length.
Match Readiness to the Receiving System
The destination changes the amount of development a seedling needs before transfer. A plant ready for a carefully irrigated media bed may still be too small for a channel where its roots cannot yet reach moisture. Before moving anything, compare the plug position, expected water level, irrigation pattern, and root reach. The seedling must have access to water without leaving the stem base continuously submerged.
In deep-water culture, the plug is typically supported in a net pot while roots extend toward the nutrient solution. If the root tips do not yet reach the moist zone, top watering may be needed temporarily. Raising the solution excessively to compensate can saturate the plug and reduce oxygen around the stem. A small gap with bubbles or splashing that keeps emerging roots moist is generally safer than drowning the entire starter cube.
Nutrient film technique creates a different constraint. A shallow film passes along the channel floor, so roots must reach that film or remain moist through the plug until they do. A tiny seedling placed high in an oversized net cup may dry even though solution is flowing correctly below it. Confirm physical contact before filling the channel; flow alone does not guarantee access.
Drip and media-based installations offer more control because irrigation can be directed near the plug. They also introduce the risk of overwatering. A dripper aimed continuously at a small cube can keep it saturated while the surrounding clay pebbles or other coarse medium looks dry. Begin with delivery that moistens the young root zone, then adjust frequency as roots spread and water use increases.
Environmental differences also influence timing. Seedlings started under gentle light and high humidity may wilt when moved beneath stronger fixtures or into faster airflow. Reduce the abruptness of that change by increasing light exposure and air movement gradually before transfer. Outdoor-bound plants need a separate hardening process because sunlight, wind, and temperature swings are more demanding than indoor conditions.
Use this destination check before proceeding:
- Verify that roots or the plug will contact a reliably moist zone.
- Keep the crown and stem base above standing solution.
- Confirm that the net pot or collar supports the plant without crushing it.
- Compare nursery and production-area light, temperature, and airflow.
- Prepare temporary hand-watering only if the installation cannot yet reach short roots.
This system-specific judgment prevents a common error: treating visible roots as proof that every receiving setup is suitable. A fuller discussion of when hydroponic plants are ready for transplanting must account for where those roots will obtain moisture during the first day.
Transplant With Minimal Root and Moisture Stress
Good handling preserves the readiness developed in the nursery. Prepare the production site before lifting seedlings so roots are not left exposed while net pots, collars, pumps, or irrigation lines are arranged. Run the installation, confirm circulation, and check that each planting position receives water as intended. Correcting a blocked line after seedlings have begun wilting adds avoidable stress.
Moisten the starter plug before transfer, but allow excess water to drain. A hydrated plug protects fine roots and is less likely to crumble. Lift it from below or hold its outer edges. If direct contact with the plant is unavoidable, handle a leaf gently rather than pinching the stem; a damaged leaf may be replaced, while a crushed main stem often cannot recover normally.
Set the plug at a height that supports the seedling without burying the crown. Loose media should stabilize the plug rather than press tightly against the stem. Clay pebbles, for example, can shift when a system fills or when tubing moves. Add them carefully around the cube and test whether the plant stays upright without packing the particles so firmly that roots and airflow are restricted.
Protect roots from bright light during the move. Exposed roots dry quickly and are adapted to darkness, so transfer one plant at a time rather than laying an entire tray on the work surface. If several positions must be prepared, keep the remaining seedlings in their tray until each site is ready. Do not trim healthy young roots merely to fit a net pot; enlarge the opening, guide the roots gently, or transplant earlier next time.
A drastic nutrient change can compound physical stress. Seedlings raised with a mild feed should not automatically be placed into a solution managed for mature, heavily feeding plants. Crop requirements differ, and a mixed-age installation may force a compromise. When possible, group similarly developed plants or transition young plants through a suitable nursery stage before joining the main reservoir.
After placement, label the crop and transplant date, then observe rather than repeatedly repositioning it. Mild drooping for a short period can occur after handling, but continuing collapse, a dry plug, or a waterlogged stem base calls for correction. Stable posture, fresh root extension, and new leaf growth indicate that the transfer conditions are working.
Recognize Poor Timing and Early Failure Signs
Transplanting too early usually produces moisture and support problems. The plug may fall apart, the roots may not reach the wetted area, and a weak stem may lean out of its collar. The immediate response should be to restore reliable moisture around the plug and improve support without submerging the crown. If the production site cannot accommodate the short roots, returning an undamaged plant to nursery conditions may be safer than repeatedly hand-watering an unsuitable position.
Transplanting too late creates a different set of failures. Roots can grow through tray openings, intertwine with nearby plants, or form a dense mat around the plug. Large leaves also increase water demand during handling. Separation then removes fine roots at the same time the shoot needs substantial moisture. Earlier transfer, wider tray spacing, or more frequent root checks prevents this better than cutting apart an established root mass.
Distinguish temporary adjustment from continuing decline. A seedling that droops briefly but regains firmness and resumes growth is responding differently from one whose leaves remain limp while the plug dries. Inspect the moisture path first: touch the exterior of the plug, verify flow at that exact planting site, and check whether roots contact the intended wet zone. A functioning pump does not prove that every channel or emitter is delivering correctly.
Persistent yellowing, burned-looking margins, or stalled new growth may point to a mismatch in solution concentration, pH, root-zone oxygen, temperature, or light intensity. Avoid changing every setting at once. Correct the most direct physical problem first, such as a dry plug or submerged crown, then watch the new growth. Older damaged leaves may not recover, so fresh leaves and roots are better indicators of progress.
Remove a seedling when the stem base becomes soft, roots deteriorate rapidly, or decay threatens neighboring plants and shared solution. Keeping a severely compromised plant rarely saves time if it introduces damaged tissue into the production area. Clean the planting position, verify the underlying moisture or support problem, and replace the seedling only after the cause has been corrected.
The useful distinction is not simply early versus late. Successful timing places a structurally sound plant into a location capable of supplying immediate moisture, oxygen, support, and an appropriate environment. That combined assessment is more dependable than seed-packet age estimates or a single visible root.
Frequently Asked Questions
How many true leaves should a hydroponic seedling have before transplanting?
Two or three true leaves are often sufficient for quick-growing greens, provided the roots hold the plug together. Larger fruiting crops may benefit from additional development and a thicker stem.
Do roots need to come out of the starter plug first?
Visible roots are useful confirmation, but they do not need to be long or abundant. Look for several healthy roots and enough internal growth to keep the moist plug intact during handling.
Can seedlings be transplanted with only cotyledons?
It is possible, but the seedling has little established structure and may be vulnerable to drying or unstable placement. Waiting for true leaves is usually more reliable unless the nursery and production stages are closely integrated.
Should starter plugs touch the nutrient solution?
The roots need dependable moisture, but the entire plug should not remain saturated. Position it so roots can reach solution, mist, splashing, or a moist zone while the stem base stays aerated.
Why did a seedling wilt immediately after transplanting?
Check for a dry plug, roots positioned above the water path, damaged tissue, stronger light, or excessive airflow. Correct the moisture connection first, then reduce abrupt environmental differences while the plant establishes.
Conclusion
Use plant condition and production-site fit to choose the transplant date. True leaves, an upright stem, distributed healthy roots, and an intact plug show that the seedling can be handled, but the receiving position must also deliver moisture without saturating the crown. Inspect roots gently, prepare the installation before lifting plants, and avoid forcing short roots into a setup they cannot yet reach.
During the first period after transfer, check each planting site rather than assuming system-wide flow reaches every seedling. Firm leaves, new root extension, and continued growth confirm establishment. Persistent wilting, a dry or soaked plug, stem softness, and deteriorating roots require prompt correction. Recording which crop, plug size, and growth stage transferred successfully will make future timing more precise for the specific installation.
Related Content
- Eco-Friendly Hydroponics for Green Living
- How to Grow Microgreens Hydroponically for High Returns
- Compact Hydroponic Grow Kit: Essentials for Thriving Indoor Gardens
- Hydroponic Gardening vs. Traditional Soil Gardening: Which Is Better?
- The Ultimate Guide to the 2025 Best Compact Hydroponic System for Space-Saving Gardening