Clean hydroponic air stones safely by disconnecting the air pump, rinsing away loose residue, and soaking the stones in a diluted disinfecting solution before rinsing and drying them completely. Use either one part unscented household bleach to nine parts water for about 10 minutes or 3% hydrogen peroxide without mixing the two chemicals. Never scrub porous stones aggressively, boil bonded stones, or run liquid backward into the pump. Replace any stone that remains clogged, produces uneven bubbles after cleaning, crumbles, or carries roots and mineral deposits too deeply for the disinfectant to reach.
When an Air Stone Needs Cleaning or Replacement
A declining bubble pattern is the most useful reason to inspect an air stone. A clean unit releases bubbles across most of its porous surface, while a restricted one may bubble from only one end, form a few unusually large bubbles, or require noticeably more pump pressure. These changes reduce water movement around the stone and may leave poorly circulated areas in the reservoir.
Several materials can block the pores. Nutrient salts may crystallize as water evaporates, especially around a stone positioned near the solution surface. Biofilm can develop when light, plant debris, warm solution, and organic material are present. Fine root fragments may also wrap around the stone or enter its outer pores. The visible coating is only part of the problem: deposits inside the pore network can remain after the outside looks clean.
Check the simple causes before assuming the stone is clogged. A pinched airline, loose connector, clogged pump filter, failing diaphragm, or leaking manifold can all reduce aeration. Disconnect the stone and briefly run the pump with an unobstructed piece of tubing. Strong airflow from the bare tube points toward a blocked stone; weak flow means the pump, tubing, check valve, or connection deserves attention first.
Cleaning is reasonable when the stone is structurally sound and has a light mineral film or slippery surface coating. Replacement is safer when it sheds grit, has a crack, stays slimy after disinfection, contains roots that cannot be removed, or still releases air through only a small area. Air stones are consumable parts, and extended soaking cannot restore pores that have been permanently sealed or physically damaged.
Reservoir history matters as well. A stone taken from a healthy system may only need routine cleaning, but one exposed to root decay, heavy biofilm, or an unexplained system problem should be treated as contaminated equipment. In that situation, replacing an inexpensive stone can be more dependable than trying to verify that disinfectant reached every internal passage. The same judgment applies when following a broader air-stone cleaning routine: cleanliness should be evaluated by condition and airflow, not appearance alone.
A Safe Air-Stone Cleaning Process
Safe cleaning begins by isolating electricity and preventing reservoir liquid from reaching the pump. Switch off and unplug the air pump before removing tubing or lifting the stone. Keep the pump above the reservoir waterline when possible, and use a correctly oriented check valve if the installation requires one. Never immerse the pump, its cord, a manifold, or electrical connectors.
Remove the air stone gently rather than pulling it up by the airline. Holding the fitting reduces stress on the connection and limits the chance of snapping a brittle stem. Detach roots with gloved fingers and rinse the stone under clean running water. Do not use a wire brush, needle, or abrasive pad: forcing debris deeper into the pores or enlarging a few openings can produce an uneven bubble pattern.
A practical sequence is:
- Disconnect: Unplug the pump, remove the stone, and inspect the airline and check valve.
- Rinse: Wash away loose nutrient residue, roots, and surface slime without aggressive scraping.
- Soak: Fully submerge the stone in one freshly prepared disinfecting solution for the appropriate contact time.
- Rinse again: Use abundant clean water, paying attention to the inlet and any recess around the fitting.
- Dry and test: Allow the stone to dry in a clean location, then test it in plain water before returning it to nutrient solution.
Running air through a submerged stone during the chemical soak is usually unnecessary and creates avoidable risks. It may generate splashes or chemical mist, expose pump components to corrosive vapor, and encourage liquid to migrate through the line if the pump stops. Passive immersion is simpler. Turn or weigh down a floating stone so the entire porous surface stays in contact with the solution.
After disinfection, rinse until no cleaning-solution odor or visible residue remains. If bleach was used, a cautious grower can soak the rinsed stone briefly in fresh water and replace that water once before drying. Do not return a stone carrying disinfectant directly to a planted reservoir; concentrated chemical residue can contact roots and may disrupt microorganisms in systems intentionally managed with biological inoculants.
Test the cleaned stone in a separate container of plain water. A broad, consistent bubble field indicates that cleaning restored airflow. A few active spots surrounded by inactive material indicate internal blockage, even if the stone looks new. Keeping the test outside the reservoir also prevents loosened debris or residual cleaner from entering the growing solution.
Choosing and Handling a Cleaning Solution
Unscented household bleach and 3% hydrogen peroxide are practical options, but they must remain separate. Bleach diluted to one part bleach and nine parts water provides a short disinfection soak for compatible air stones. A contact period of about 10 minutes is generally more sensible than leaving porous equipment in bleach for hours. Product concentration can vary, so check the label and avoid scented, splashless, gel, or detergent-containing formulations that may leave additives behind.
Standard 3% hydrogen peroxide can be used without dilution for a brief soak, commonly around 10 to 15 minutes. It avoids chlorine odor and decomposes over time, but that does not make careless handling acceptable. Peroxide can irritate skin and eyes, and an old bottle that has been repeatedly exposed to light or air may have lost strength. Use fresh solution in a clean container rather than pouring used liquid back into its original bottle.
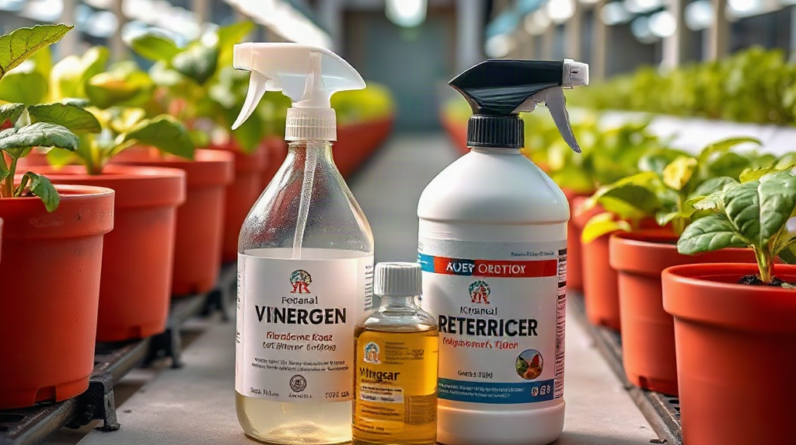
Never combine bleach with peroxide, acids, vinegar, ammonia, reservoir pH adjusters, or another cleaner. Chemical mixtures can release hazardous gases, react vigorously, or create compounds unsuitable for contact with hydroponic equipment. Wear gloves and eye protection, provide ventilation, follow the cleaner label, and keep the soaking container away from children, pets, nutrients, and food-preparation surfaces.
Vinegar is sometimes proposed for air-stone maintenance because mild acid can loosen some mineral scale. It is not an equivalent substitute when the goal is dependable disinfection of a stone exposed to heavy slime or diseased roots. If vinegar is used for scale, apply it as a separate cleaning stage, rinse thoroughly, and never add bleach to the same container or to equipment that still holds acidic liquid. Disinfection and descaling solve different problems.
Boiling is another poor default. Some ceramic products may tolerate heat, but bonded stones, plastic fittings, adhesives, and fine-pore diffusers can crack, soften, or separate. Manufacturer instructions should override a general cleaning method. When material compatibility is unknown, a short chemical soak followed by extensive rinsing is less likely to cause hidden heat damage.
Do not pour spent cleaning liquid into the nutrient reservoir or onto growing plants. Dispose of it according to its product label and local household guidance. Prepare only the volume needed to cover the stone, and label the temporary container so it cannot be mistaken for water. These precautions are integral to cleaning hydroponic air stones safely, rather than optional steps added after the cleaning itself.
Testing the Stone and Preventing Repeat Clogs
A successful cleaning restores distributed airflow without damaging the stone. Test it at roughly the same depth and with the same pump used in the reservoir because water depth creates back pressure. A stone that performs well in a shallow cup may struggle at the bottom of a deep tank. Compare bubble coverage, not merely the total agitation at the surface.
Large bubbles are not automatically proof of failure; pore size differs among ceramic stones, mineral stones, and membrane diffusers. The meaningful change is a departure from that device’s normal pattern. If a previously even cylinder now bubbles only near its inlet, rotate it underwater and inspect for a hairline fracture or blocked region. Confirm that another known-good stone works on the same airline before discarding the suspect unit.
Preventive maintenance reduces the amount of material that reaches the pores. Keep light out of the reservoir, remove dead roots and fallen leaves, wipe nutrient spills, and avoid letting the solution level drop far enough to expose and repeatedly dry the stone. Wet-dry cycles can leave concentrated mineral deposits near the waterline. Placing the diffuser where roots cannot engulf it also makes removal easier and limits physical blockage.
Inspect airflow during normal reservoir checks rather than relying on a fixed cleaning date. Hard water, concentrated nutrients, warm conditions, and organic additives can shorten the interval between cleanings. A lightly stocked reservoir using clean mineral nutrients may run much longer without restriction. Calendar-only maintenance can lead either to unnecessary chemical exposure or to a neglected stone that has already lost most of its active surface.
Keeping a spare stone provides a useful comparison and avoids leaving roots without normal aeration while equipment soaks and dries. Label diffusers by reservoir if multiple systems are operating. Moving a used stone between reservoirs without disinfection can transfer biofilm and root material, while mixing different stone types makes pump-performance comparisons unreliable.
Persistent clogging after frequent cleaning often indicates a system condition rather than a defective batch of stones. Check whether light reaches the solution, sediment settles near the diffuser, additives form residues, or roots are deteriorating. Correcting those causes is more effective than repeatedly applying stronger cleaner. For a repeatable air-stone maintenance process, record when bubble coverage declines, what deposits are present, and whether cleaning restores the original pattern.
Frequently Asked Questions
Can I Clean an Air Stone With Bleach?
Yes. Soak a compatible stone for about 10 minutes in one part unscented household bleach and nine parts water, then rinse it thoroughly, soak it briefly in fresh water if desired, and dry it before testing. Never combine bleach with another cleaner.
Can I Use Hydrogen Peroxide Instead?
Standard 3% hydrogen peroxide can be used as a separate 10- to 15-minute soak. Use fresh solution, protect your eyes and skin, rinse the stone well, and never mix peroxide with bleach or other chemicals.
Should I Boil a Hydroponic Air Stone?
Not unless the manufacturer explicitly permits it. Heat can crack ceramic material, loosen bonded particles, or deform plastic fittings, leaving damage that may not be obvious until the stone is pressurized.
How Often Should Air Stones Be Cleaned?
Inspect them during reservoir maintenance and clean when bubble coverage declines or deposits appear. Water hardness, nutrient concentration, organic inputs, light exposure, and root contact make a fixed universal schedule unreliable.
When Should a Clogged Air Stone Be Replaced?
Replace it if it crumbles, cracks, retains embedded roots or slime, or continues bubbling through only a small area after cleaning. First test the pump, tubing, valve, and connection so a separate airflow fault is not mistaken for a bad stone.
Conclusion
Air-stone maintenance should protect both aeration performance and the reservoir from chemical residue. Diagnose the entire air path before cleaning, remove loose contamination gently, and use only one compatible disinfectant in a ventilated work area. Thorough rinsing and a plain-water bubble test matter as much as the soak itself.
Judge the result by distributed airflow at the stone’s normal operating depth. If cleaning leaves inactive areas, embedded organic matter, cracks, or shedding material, replacement is the more reliable choice. Afterward, limit light, remove decaying roots, maintain the solution level, and watch for changes in bubble coverage. Those observations reveal whether the stone simply reached the end of its service life or whether reservoir conditions are causing repeated blockages.
Related Content
- Enhancing Plant Growth with the Right Hydroponic Growing System Accessories
- How to Use Beneficial Microbes in Hydroponic Farming
- How Hydroponic Farming Saves Water and Boosts Yield
- How to Combat Diseases in Hydroponic Systems: Effective Methods and Common Mistakes
- Discover the Most Effective Hydroponic Systems for Beginners