How Perlite Behaves During Flood and Drain Cycles
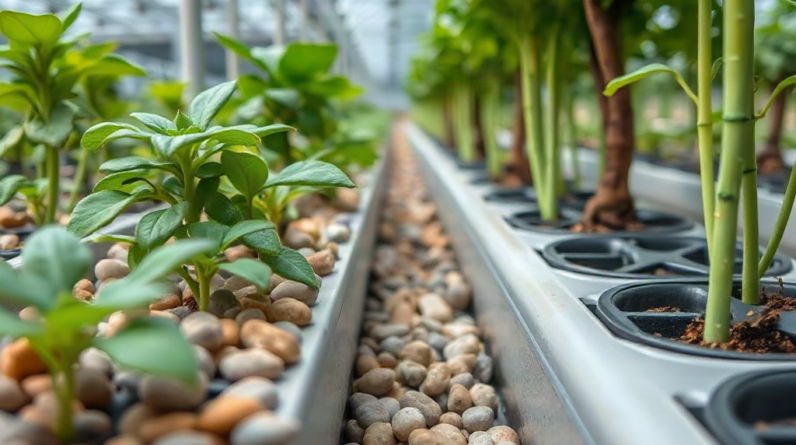
Expanded perlite creates a root zone with high air space and modest water storage rather than acting like a saturated sponge. During a flood cycle, nutrient solution moves through gaps between the particles and wets their irregular surfaces and internal pores. Once the tray drains, most free solution leaves quickly, while a thin film remains available to roots. That rapid shift from wet to aerated conditions is the main reason perlite can suit ebb-and-flow operation.
The same drainage that protects roots from prolonged saturation also reduces the margin for missed irrigation. A mature plant under strong lighting may remove the retained moisture much faster than a seedling in a cool room. The upper layer can look dry while the lower root zone still contains usable moisture, so surface color alone is a poor scheduling tool. Check moisture several centimeters below the surface or lift a representative pot to compare its weight immediately after drainage and shortly before the next flood.
Perlite is lighter and less water-retentive than many coco-based mixes. Compared with expanded clay pebbles, it generally holds more solution against its surfaces, but individual grades and particle sizes change that comparison. Fine material packs more tightly and retains more water; coarse particles preserve larger air gaps and drain more freely. A schedule developed for clay pebbles may leave perlite unnecessarily wet, while a schedule copied from coco may flood too often because coco distributes moisture differently through its fibers.
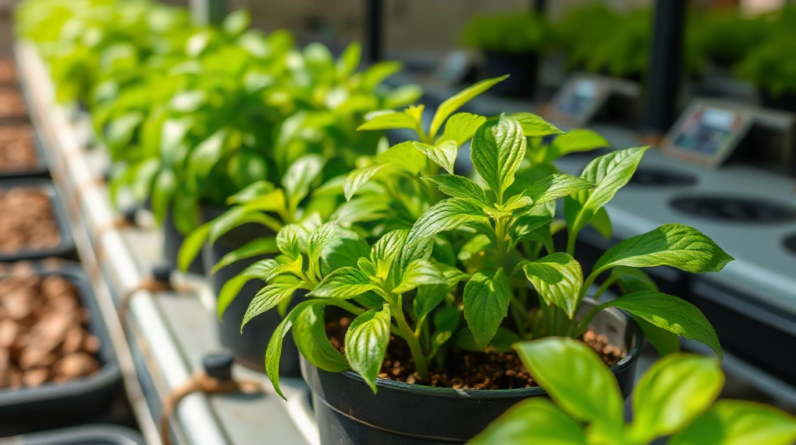
A practical example is a bench containing small leafy greens and larger fruiting plants. Flooding every pot on one timer may work while plants are young, then become uneven as the larger canopy consumes water faster. Grouping containers by crop size or growth stage gives the timer a more coherent job. If that is not possible, monitor the driest representative pot rather than assuming every root zone behaves like the wettest one.
The common misconception is that more frequent flooding automatically delivers more nutrients. Roots need oxygen between irrigations, and nutrient ions remain in the retained film after the pump stops. Prioritize complete drainage, consistent wetting, and adequate moisture at the next cycle. The broader subject of Perlite use in hydroponic flood systems therefore centers on balancing retained solution with renewed root-zone air.
Choosing Perlite Grade, Containers, and Bed Depth
Coarse horticultural perlite is usually the most manageable grade for a flood table because it maintains pore space and is less likely to escape through drainage openings. Avoid construction-grade products and very dusty material whose particle size, cleanliness, or additives are unsuitable for plant roots. Product labels should identify the material for horticultural use; if a wetting agent or fertilizer charge is present, account for it before combining the medium with a nutrient program.
Rinse or pre-wet dry perlite gently before filling containers. Dry dust can irritate eyes and airways, while aggressive washing can drive smaller particles through the screen and into plumbing. Work outdoors or in good ventilation, avoid pouring from height, and follow the handling directions on the package. Once damp, the medium is easier to place without producing a cloud of fines.
Container design matters as much as particle grade. Net pots with large slots may lose perlite unless they are lined with a durable mesh that still permits rapid drainage. Fabric pots contain particles well, but their bases must sit flat and drain without remaining in a puddle. Solid nursery pots need numerous unobstructed openings near the bottom. Whatever the container, roots should not be able to form a dense mat across an undersized outlet.
Bed or pot depth influences how moisture is distributed after drainage. A very shallow layer has little reserve and may dry abruptly, especially around exposed edges. An excessively deep container can keep its lower zone wetter while the crown remains far above the flood line. For a typical pot, the flood should reach enough of the lower medium for capillary wetting to extend upward without submerging the stem base. Test this with an empty planted-equivalent container before filling an entire bench.
Pure perlite offers maximum drainage but little structural weight. Tall or top-heavy crops can tip, and buoyant particles may shift when solution enters rapidly. Mixing perlite with another compatible medium can increase water retention or stability, but it changes irrigation behavior. Coco-perlite blends generally need less frequent flooding and closer attention to salt accumulation than coarse perlite alone. Clay pebbles can add weight, although layering unlike materials may create uneven wetting; a uniform, tested blend is usually easier to manage than separate strata.
A weak setup assumes the tray itself can hold loose perlite without containment. Floating particles then migrate toward standpipes and pumps. Use pots, mesh sleeves, or a properly screened bed, and leave a small unfilled margin at the top. That margin limits media loss when the nutrient solution rises and gives room for root expansion.
Setting Flood Height, Duration, and Frequency
Flood settings should be established by observing how quickly the root zone wets and drains, not by relying on a universal timer interval. Pump capacity, tray area, container height, return-line diameter, crop size, temperature, and airflow all alter the result. The goal is to wet the active root zone, stop once adequate contact has occurred, and restore air promptly after the pump switches off.
Set the maximum water level below the crown of the plant and below the loose upper edge of the medium. If starter cubes sit inside perlite, routinely submerging the cube can keep the stem zone persistently damp. A lower flood level allows solution to enter the bottom of the pot and rise through capillary action. Mark the operating level on the tray or standpipe so changes caused by blocked plumbing or an altered reservoir volume are easy to notice.
Duration includes both filling and any time spent at full height. A powerful pump may fill a small table quickly, whereas a long bench may require more time to reach its far end. Watch one complete cycle and confirm that distant pots wet adequately before the return begins. Extending a flood merely because the timer permits it is counterproductive once the medium is evenly wetted; the extra time displaces root-zone air without adding much useful moisture.
Use a short commissioning process rather than guessing:
- Run a test flood: Record fill time, maximum level, and the time required for visible drainage to finish.
- Inspect several positions: Check pots near the inlet, at the center, and at the far end for comparable wetting.
- Measure the dry-back: Examine below-surface moisture before the proposed next cycle and compare representative pot weights.
- Adjust one variable: Change frequency before changing nutrient strength, and reassess after plants have experienced several cycles.
Young transplants often use water slowly, while established plants under warm, bright conditions can require shorter intervals between floods. Night irrigation may be reduced because transpiration declines, but it should not be removed automatically if the medium becomes excessively dry before morning. A system experiencing a missed overnight cycle is a useful stress test: wilted leaves and very light pots indicate inadequate reserve, while heavy pots and sluggish growth suggest the opposite problem.
The clearest sign of suitable timing is a root zone that remains moist enough to avoid wilting yet gains air after every drainage event. Repeated drooping just before irrigation, dry peripheral roots, or sharply concentrated reservoir readings can indicate excessive dry-back. Persistently heavy pots, algae near the crown, and roots that remain waterlogged point toward excessive frequency, poor drainage, or both. Adjust the physical drainage fault before shortening or lengthening the timer.
Preventing Floating Media, Clogged Lines, and Root Problems
Media containment is the first operational safeguard because perlite is buoyant enough to move during rapid flooding. Loose granules can collect around standpipes, enter return plumbing, abrade pump components, or reduce flow through narrow fittings. Cover drains with removable screens sized to stop the chosen grade without restricting water, and inspect those screens where they can be reached without dismantling the table.
Control the inlet as well as the outlet. A concentrated jet can excavate a channel through the pot, expose roots, and push particles over the rim. Diffuse incoming flow below the container level or use a tray design that raises solution evenly. Slowing the initial surge may improve stability, but the pump must still supply enough flow to reach the intended level before substantial drainage offsets filling.
Channeling is less obvious than floating media. If perlite settles unevenly or roots create preferential paths, solution can rush through one side while another area stays comparatively dry. After a cycle, inspect moisture at multiple points instead of testing only beside a drainage hole. Re-seat tilted pots, loosen a compacted surface carefully, and replace collapsed mesh that is pinching the lower medium. Do not compress perlite firmly during planting; gentle settling preserves the voids that make it useful.
Root discoloration needs interpretation rather than an immediate assumption of disease. Nutrient staining can darken roots, while low oxygen, warm solution, accumulated debris, and incomplete drainage can all contribute to genuine decline. Healthy new roots are generally firm and actively extending. Roots that become soft, break easily, or have an unpleasant odor warrant checks of reservoir temperature, pump operation, dissolved oxygen where measurable, return speed, and sanitation.
Salt accumulation is another failure mode, especially where evaporation is high or flood cycles only wet part of the container. White deposits at the surface do not reveal the entire root-zone concentration. Compare the electrical conductivity and pH of the reservoir over time, and periodically sample drainage from representative containers if the system design permits. A controlled flush with appropriately balanced solution may be useful when root-zone readings diverge materially from the reservoir, but repeated flushing without correcting excessive feed strength or evaporation only treats the symptom.
For a fuller system review, revisit Perlite use in hydroponic flood systems whenever pump size, crop type, pot depth, or medium blend changes. Those alterations affect hydraulic behavior, so an old timer schedule should not be treated as permanent.
Monitoring, Cleaning, and Reusing Perlite
Routine monitoring should connect plant response to the physical cycle. Record reservoir level, pH, electrical conductivity, flood completion, and drain-back behavior at consistent times. A falling reservoir combined with rising conductivity often indicates plants are taking up proportionally more water than dissolved salts; adding stronger nutrient solution without checking the trend can intensify root-zone concentration. Follow the nutrient manufacturer’s crop-appropriate directions and make measured corrections rather than chasing every small reading.
Inspect hardware during an actual cycle. A pump can sound normal while delivering less flow because its intake is coated with roots or perlite fragments. Confirm that the far end of the table reaches the marked level, the overflow remains clear, and the tray empties without isolated puddles. A slow return may indicate a partially blocked fitting, undersized plumbing, poor tray slope, or roots entering the drain.
Perlite does not decompose like an organic medium, but that does not make indefinite reuse automatic. Used material can contain root fragments, precipitated salts, algae, and pathogens from a previous crop. Reuse is most defensible when the prior plants were healthy and the particles remain structurally useful. Remove roots, wash out debris, and use a sanitation method appropriate for horticultural equipment and compatible with the system. Never mix cleaning products, and rinse as directed before planting.
Replacement is the safer choice after unexplained root disease, severe algae contamination, or heavy accumulation that cannot be removed consistently. Disposal and reuse options vary by location, and loose perlite should be contained so wind cannot disperse it. Recovered material may also contain more fines after handling, producing tighter packing than a new coarse grade. Test a small pot for drainage before committing a cleaned batch to an entire flood bench.
A useful end-of-crop comparison is drainage time when new versus drainage time after harvest. If the same container now empties slowly, inspect root mats, fines, mesh deformation, and blocked outlets. Replacing the pump will not solve resistance inside the pots. Conversely, pots that drain normally while the tray stays full point toward the common return line. Separating container problems from bench plumbing avoids unnecessary changes to nutrient concentration or irrigation frequency.
Frequently Asked Questions
Can perlite be used alone in an ebb-and-flow system?
Yes. Coarse horticultural perlite can be used alone if pots retain the particles, the tray drains fully, and irrigation is frequent enough to prevent excessive dry-back.
Does perlite float during a flood cycle?
Some particles can float or shift, especially with rapid inflow. Pre-wetting, leaving headspace in pots, diffusing the inlet, and screening drains reduce media movement.
How high should nutrient solution rise around perlite pots?
The solution should wet the lower root zone without reaching the plant crown or overflowing the pot. Test capillary rise because container depth and perlite grade affect the required level.
How often should a perlite flood system run?
Frequency depends on plant size, light, temperature, airflow, pot depth, and particle grade. Set it by checking below-surface moisture and representative pot weight before each proposed cycle.
Can perlite be cleaned and reused?
It may be reused after a healthy crop if roots and deposits can be removed and the material can be sanitized appropriately. Replace it after suspected root disease or substantial breakdown into fines.
Conclusion
Successful perlite operation depends more on hydraulic control than on a fixed timer recipe. Choose a coarse horticultural grade, contain it securely, protect drains, and verify that each pot wets evenly without submerging the crown. Then measure how far the medium dries between cycles under the actual crop, lighting, and room conditions.
Watch a complete flood and drain event before changing nutrient strength or buying new hardware. Uneven moisture may come from inlet turbulence, channeling, blocked mesh, root mats, or a slow return rather than from the fertilizer program. Record flood level, drain time, pot moisture, and reservoir trends, changing one setting at a time. That process preserves perlite’s useful combination of rapid drainage and retained nutrient film while exposing problems before they affect the entire bench.