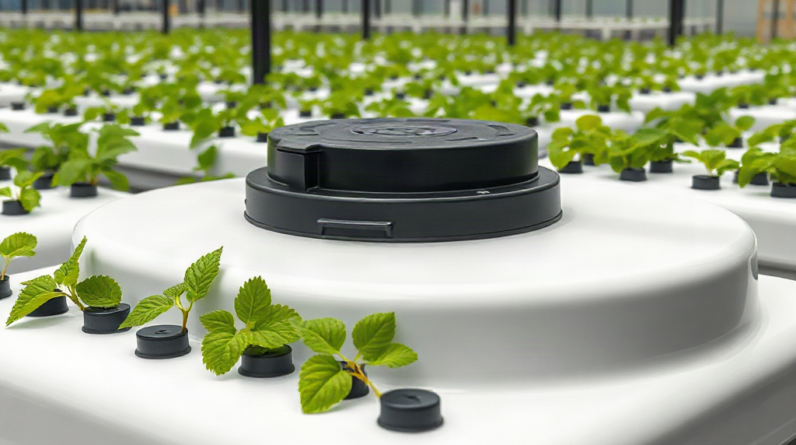
Effective reservoir lid design for hydroponic systems blocks light from the nutrient solution, supports installed equipment, limits contamination, and still allows convenient inspection and cleaning. Use an opaque, moisture-resistant panel with reinforced openings for net pots, tubing, cables, and access ports, leaving enough clearance to prevent pinched air lines and wet electrical connections. A removable hatch is usually more practical than lifting a plant-loaded lid. Overlapping edges or a shallow lip can direct condensation back into the reservoir. The finished lid should remain rigid when warm and wet, fit without sealing the tank airtight, and come apart without disturbing roots.
What a Reservoir Lid Must Accomplish
A useful lid performs several jobs at once: it excludes light, keeps debris out, supports equipment, accommodates plant growth, and allows routine reservoir work. Focusing on only one function creates predictable problems. A heavy panel may block light effectively but become impossible to remove once plants cover it. A thin panel may be easy to cut but sag until net pots sit unevenly or condensate runs toward cable openings.
Light exclusion deserves first priority because illuminated nutrient solution creates favorable conditions for algae. Even a narrow translucent strip around the rim or a loose opening beside a tube can admit enough light to cause growth near that location. Algae can consume dissolved oxygen, coat surfaces, interfere with emitters, and make sanitation more difficult. Check a proposed lid by placing it over the reservoir under the actual grow lights. Bright outlines, glowing material, and visible beams around penetrations identify areas that need an overlap, opaque collar, or better fit.
The lid also separates the solution from leaves, dust, loose growing media, and insects. It does not need to make the reservoir airtight. Roots and beneficial aeration processes still exchange gases, while air pumps and return lines may move substantial volumes through the tank. An airtight lid can also become awkward to remove if pressure changes or fittings hold it in place. The practical goal is a covered reservoir with controlled openings rather than a sealed vessel.
Structural demands vary by system. A deep-water culture lid may carry net pots, wet media, roots, and mature plants. A separate nutrient reservoir for drip or nutrient-film equipment may carry almost nothing, making a light removable cover suitable. For example, a lettuce raft and a tomato bucket place very different loads on their top panels. Tall, fruiting plants should normally have independent trellising or frames; relying on the reservoir lid to stabilize them concentrates force around net-pot holes and makes service difficult.
Temperature and service access are equally connected to design. A dark lid blocks light, but a black surface directly under strong lighting may absorb radiant heat. A reflective or light-colored upper face over an opaque core can reduce that heat gain without admitting light. Readers comparing reservoir lid design for hydroponic systems should therefore assess opacity, loading, access, and heat exposure as one set of requirements rather than choosing by appearance alone.
Choosing a Lid Material and Structure
The best lid material remains rigid in humid conditions, tolerates nutrient splashes, blocks light, and can be cleaned without exposing absorbent edges. Common practical choices include purpose-made reservoir covers, opaque rigid plastic sheet, and properly fitted lids supplied with storage tanks or buckets. Material suitability depends on thickness and support span as much as material name. A sheet that works across a narrow bucket can bow badly across a wide tote.
Rigid plastics are popular because they do not swell like unfinished wood and can be drilled for fittings. Their limitations become apparent when the panel is too thin, poorly supported, or exposed to heat. Sagging reduces clearance above the solution and can pull openings out of alignment. Brittle plastic may crack from sharp inside corners or holes drilled too close to an edge. Rounded corners, smooth cutouts, and reinforcement beneath loaded areas reduce stress concentration.
Foam insulation board is easy to shape and can add thermal resistance, but exposed foam is vulnerable to dents, abrasion, and difficult-to-clean surfaces. It is better treated as an insulated core within a durable, opaque facing than as a permanent bare working surface. Plywood can be strong, yet untreated edges absorb moisture and become hard to sanitize. Paint alone may chip around drilled openings. Where wood is used outside the wet zone as a support frame, keep it separated from nutrient contact and inspect its coating regularly.
Corrugated cardboard, clear acrylic, thin translucent tote lids, and loosely draped film are poor long-term solutions. Cardboard loses strength in humid air. Clear material encourages algae unless fully covered by an opaque layer. Film can fall into the solution, collect dirty condensate, or wrap around tubing. A temporary cover may be acceptable during testing, but it should not conceal weaknesses that will matter once roots and plants make the reservoir harder to reach.
Structure can compensate for reasonable material limits. A wide lid may need a center rib, perimeter frame, or support ledge inside the reservoir rim. Supports must not create traps that retain spilled solution or crush roots. Test the dry lid with a distributed load comparable to the expected net pots and wet media, then repeat the inspection after it has spent time in the warm growing area. Bowing, whitening around cuts, loose fasteners, or a changing fit indicate that the panel needs reinforcement or replacement.
When selecting materials, confirm that any surface or sealant likely to contact condensate or nutrient solution is intended for the relevant wet-use application. Avoid assuming that every plastic sheet, adhesive, paint, or printed container is suitable simply because it resists water. Manufacturer documentation is more useful than color or recycling markings alone. Material certainty, washability, and stiffness generally matter more than achieving the lowest possible lid weight.
Planning Openings, Access, and Equipment Routes
Every opening should have a defined purpose and enough clearance for installation without creating an unnecessary light leak. Sketch the lid from above before cutting it, marking net pots, fill access, pump cables, air lines, return plumbing, level sensors, and any sampling port. Then mark the space needed to remove each component. A fitting that technically passes through a hole may still be impossible to unscrew after plants or neighboring pipes are installed.
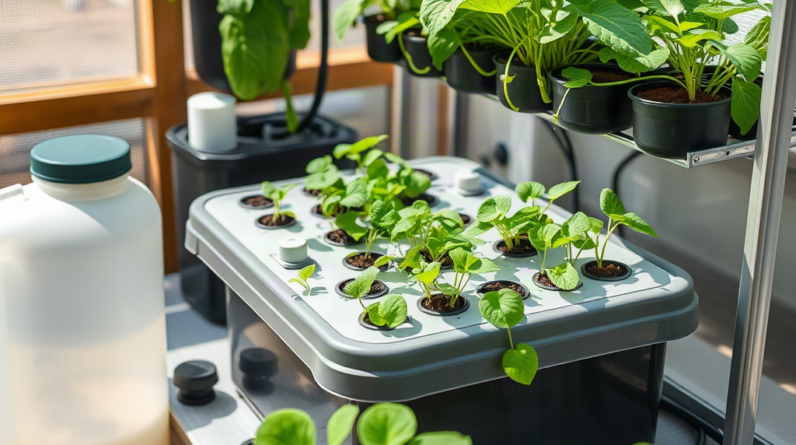
Plant openings should support the net-pot rim evenly without squeezing it. Oversized holes allow pots to tilt or drop; undersized holes make removal difficult and can crack the lid as the pot is forced into place. Place holes far enough from panel edges and one another to preserve strength. Crop spacing also belongs in this drawing. Closely spaced seedling sites may look efficient on an empty cover but become inaccessible when mature foliage overlaps.
Tubing and cables need separate consideration. A narrow slot from the edge can make a lid removable without disconnecting an air line, but an uncovered slot admits light and may pinch soft tubing. A fitted opaque flap, grommet, or overlapping plate can close the gap while retaining serviceability. Use smooth edges wherever hoses or electrical cords pass through the lid. Vibration from an air pump or recirculation line can turn a rough cut into gradual abrasion.
A dedicated inspection hatch often provides the greatest maintenance benefit. It should be large enough for a hand, meter probe, cleaning tool, or small transfer pump, depending on the reservoir. Position it over open solution rather than over a dense root mass or submerged pump. An overlapping hatch blocks light more reliably than a loose plug and is less likely to fall into the tank. Add a low-profile handle that cannot snag foliage or irrigation lines.
Consider a recirculating setup with a pump at one end and the return at the other. If the only access opening sits above the return, checking the pump requires removing the full lid and disturbing every attached line. A second service hatch or a split lid changes that task from system disassembly to a quick inspection. By contrast, a small bucket with one plant may only require a notched lid and removable net pot, provided the plant has independent support.
Before making permanent cuts, use this compact layout check:
- Mark the rim: preserve enough edge material for stiffness and a stable seat.
- Trace actual components: nominal fitting sizes do not show flanges, collars, or removal clearance.
- Plan disconnection: identify which items can remain installed when the lid is lifted.
- Block every light path: cover slots and unused planting positions with opaque removable pieces.
- Deburr the cuts: smooth surfaces protect hands, roots, tubing, and cable jackets.
A sensible reservoir lid design for hydroponic systems treats future servicing as part of the initial layout. The common mistake is optimizing the untouched reservoir and ignoring what happens after roots fill the tank, plumbing stiffens, and plants can no longer be moved safely.
Managing Fit, Condensation, and Maintenance
A lid should sit securely without scraping the reservoir, falling inward, or requiring force to open. A perimeter overlap blocks side light and tolerates minor dimensional changes better than a panel cut exactly to the inside opening. If the reservoir walls bow when full, measure them under operating conditions rather than relying on the empty container. A lid fitted tightly to an empty tote may bind after the sides expand.
Condensation forms when humid air beneath the cover meets a cooler lid surface. The underside should direct droplets back into the reservoir rather than toward the outer rim, electrical connections, or floor. A shallow internal lip, slight inward slope, or raised perimeter can improve drainage. Avoid absorbent seals that stay wet. Weather stripping may reduce light around an irregular edge, but it must tolerate moisture, remain cleanable, and avoid forming a hidden channel where residue accumulates.
Electrical penetrations deserve conservative placement. Keep connectors, power strips, and plug joints outside the splash and condensation path, and preserve drip loops in cords. The lid should never carry a connection where pooled liquid can reach it. If lifting the cover pulls on a pump cable, reroute the cable through a smooth edge slot or install a removable access segment. The goal is mechanical freedom: opening the reservoir should not tug submerged equipment or loosen external electrical connections.
Cleaning exposes design quality quickly. A one-piece cover loaded with plants may remain in place for an entire crop cycle, allowing residue to build beneath it. Split covers and removable hatches are easier to wash, but each seam becomes another possible light path. Overlapping joints offer a useful compromise. Hinges can keep a hatch attached, although metal hardware in a humid environment may corrode and hinge lines can trap deposits. A simple lift-off panel is often easier to sanitize.
Inspect the cover whenever the solution is checked. Green film around a penetration points to a light leak. Persistent water outside the rim suggests poor condensate drainage, an overflowing return, or a lid that slopes outward. A widening bow indicates inadequate stiffness or heat deformation. White crust around openings usually marks repeated evaporation and should be cleaned before it interferes with fit. Cracks radiating from corners or fasteners call for load reduction and repair rather than another layer of tape.
Test the completed lid before plants make changes difficult. Fill the reservoir to its normal operating level, run aeration and circulation, and leave the grow lights on through a normal cycle. Open each hatch, remove the pump if applicable, and verify that every tube stays unkinked. Look beneath the cover for bright spots and above it for escaping moisture. This trial reveals whether the design works as an operating component, not merely as a cover that fits.
Frequently Asked Questions
Should a hydroponic reservoir lid be airtight?
No. It should block light and debris while permitting necessary tubing, airflow, and pressure equalization. Controlled, covered openings are more practical than an airtight seal.
What color should the lid be?
The lid must be opaque. A light-colored or reflective upper surface can absorb less radiant heat than black, but its underside and edges must still prevent light from reaching the solution.
How thick should a reservoir lid be?
Thickness depends on material, unsupported span, and expected load. Choose a panel that does not bow under wet net pots and equipment, or add cleanable ribs or perimeter support.
Can insulation foam serve as the lid?
It can work in limited applications, but bare foam dents and can be difficult to clean. A durable opaque facing makes it more suitable for repeated handling.
How can unused net-pot holes be covered?
Use fitted, opaque, removable plugs or overlapping covers that cannot fall into the reservoir. Check them under operating lights to confirm that their edges do not glow.
Conclusion
A reliable reservoir cover is designed around operation rather than the empty container. Confirm complete opacity under the installed lights, match panel stiffness to its span and load, and provide direct access to pumps, probes, and fill points. Route lines through smooth, protected openings, while keeping electrical connections away from condensate and splashes.
Build or modify the lid before planting, then test it with the reservoir full and all circulation equipment running. Watch for inward sag, outward drainage, pinched hoses, bright gaps, and components that cannot be removed independently. Correcting those faults early is far easier than lifting a plant-loaded panel later. A lid that can be inspected, cleaned, and opened without dismantling the growing area will remain useful long after a perfectly fitted but inaccessible cover becomes an obstacle.
Related Content
- The Ultimate Guide to 10 Effective Hydroponic Plants for 2025 Success
- Choosing the Right Growing Medium for Your Hydroponic System
- Reducing Replacement Costs in Hydroponic Gardens by Fixing Wear, Leaks, and Root-Cause Failures
- Can Regular Seeds Be Used For Hydroponics?
- URUQ 12 Pods Indoor Gardening System Review