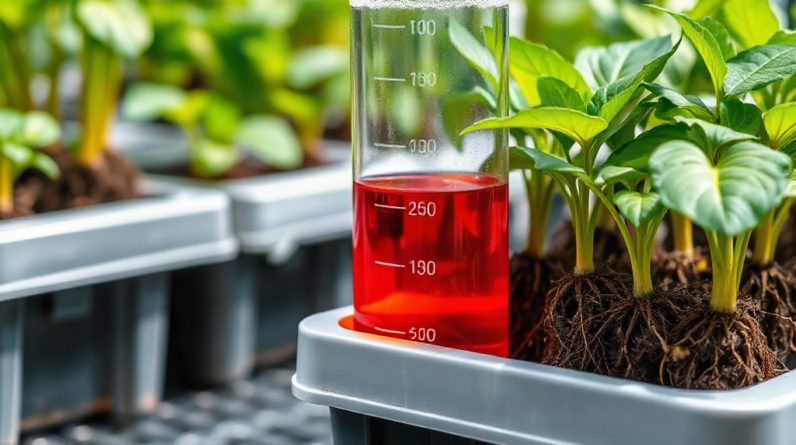
Deal with nutrient solution contamination by isolating the reservoir, stopping recirculation between affected and unaffected plants, and deciding whether the solution can be corrected or must be discarded. Cloudiness, slime, unusual odor, drifting pH, blocked emitters, and discolored roots can indicate microbial growth, organic debris, chemical mixing errors, or contaminated source water. Remove compromised plants and debris, drain unsafe solution, clean wetted components, and apply a system-compatible disinfectant at its labeled concentration before rinsing thoroughly. Restart with clean water and freshly mixed nutrients, then verify pH, electrical conductivity, temperature, flow, and root condition before returning the system to normal operation.
Confirm the Type and Extent of Contamination
Contamination should be identified by a pattern of evidence rather than by one unusual reading. A reservoir can look clear while carrying plant pathogens, and harmless nutrient precipitate can be mistaken for microbial slime. Begin by observing the solution, roots, equipment, and plants before adding corrective chemicals that could conceal useful clues or create a second problem.
Microbial contamination often produces slippery films, suspended organic matter, an earthy or sour odor, or roots that progress from pale cream to tan and then soft brown. Low dissolved oxygen and warm solution can accelerate this deterioration because stressed roots leak organic compounds that feed microorganisms. Root discoloration alone is not conclusive: some nutrient products, media dust, and additives stain otherwise firm, functioning roots. Texture and odor are usually more informative than color by itself.
Chemical contamination follows a different pattern. Accidental overconcentration, incompatible concentrates, cleaner residue, or poor source water may cause abrupt electrical conductivity changes, unusual pH behavior, precipitate, leaf-edge injury, or rapid wilting despite adequate water. Never combine concentrated nutrient parts directly; calcium-rich concentrates can react with phosphates or sulfates and form solids before dilution. A conductivity meter indicates the quantity of dissolved ions, not whether those ions are appropriate or safe.
Check the reservoir temperature, pH, electrical conductivity, pump operation, air delivery, return flow, emitters, and the condition of roots from several locations. Compare plants near the first feed point with those at the far end of the system. If symptoms cluster around one channel or irrigation line, the source may be localized debris, a blocked dripper, or a diseased plant. Uniform symptoms point more strongly toward the shared reservoir, source water, or mixing process.
A useful inspection sequence is:
- Observe before disturbing: Record odor, clarity, foam, sediment, root texture, and plant distribution.
- Verify instruments: Rinse probes and check calibration before trusting an extreme reading.
- Inspect equipment: Confirm that pumps, air stones, filters, and return lines are operating normally.
- Review recent inputs: Note newly added nutrients, supplements, water, tools, plants, and cleaning products.
The common mistake is treating every cloudy reservoir as a disease outbreak. Mineral precipitation, biofilm, algae, and decaying roots require different responses. If the cause remains uncertain but plants are declining quickly, protect the crop by treating the solution as compromised while preserving photographs and records that may help identify the trigger.
Contain the Problem and Decide Whether to Drain
Containment limits exposure while the grower decides whether correction is realistic. Stop transfers between independent reservoirs, avoid moving tools from the affected area, and suspend the introduction of new plants. A shared net, measuring cup, siphon, or pH probe can carry contaminated water into a clean system even when no roots touch.
Draining is generally the lower-risk decision when the solution contains decaying roots, strong odor, persistent slime, an unknown chemical, cleaner residue, or a suspected pathogen affecting multiple plants. It is also prudent after a major nutrient-mixing error that cannot be quantified. Trying to save a questionable reservoir may conserve water and fertilizer in the short term, but it can prolong root exposure and distribute contamination through every pipe and emitter.
Correction without a complete drain is more defensible when the problem is measurable, limited, and noninfectious. For example, a modest conductivity error caused by excess nutrient can sometimes be corrected with suitable source water, followed by thorough circulation and retesting. A small amount of inert media dust can be filtered if roots remain healthy and no odor or slime is present. By contrast, dilution is not a dependable remedy for an unknown pesticide, household chemical, or disinfectant because a meter cannot confirm that the unwanted compound has reached a safe concentration.
Remove dead leaves, detached roots, and severely deteriorated plants before they continue releasing organic material. Place questionable plants away from healthy ones rather than returning them immediately after a reservoir change. If roots are soft, shedding, and foul-smelling, merely trimming visible damage may not remove contamination inside the root mass. Disposal is often more practical when one failing plant threatens a shared crop.
Handle discarded solution according to its contents and local requirements. Do not discharge concentrated fertilizer or disinfectant into storm drains, natural waterways, or places where runoff can reach wells. If the reservoir may contain a pesticide or another regulated product, follow that product’s label and contact the appropriate local waste authority when the disposal route is unclear.
A frequent failure during how to deal with nutrient solution contamination is restarting circulation before the cause has been contained. Emptying the tank while leaving contaminated channels full simply returns dirty water to the cleaned reservoir. Isolate, drain, and account for every connected branch before beginning sanitation.
Clean and Disinfect the Entire Solution Path
Effective sanitation requires physical cleaning before disinfection. Disinfectants work poorly through heavy biofilm, root fragments, algae, and mineral scale because organic matter consumes active ingredients and shields organisms on the equipment surface. Drain the reservoir and lines completely, unplug electrical equipment, and remove components that can be cleaned separately.
Start with mechanical removal. Scrub the reservoir walls, lid, pump housing, accessible tubing, manifolds, net pots, and fittings using dedicated brushes. Flush narrow lines in both directions where the design permits. Replace inexpensive porous or badly fouled components when they cannot be opened or cleaned reliably; an old air stone or opaque dripper labyrinth can retain contamination after the tank appears spotless.
Choose only a disinfectant suitable for the equipment and intended application, then follow its label for concentration, contact time, ventilation, protective equipment, and rinsing. Do not improvise mixtures or assume that a stronger solution is more effective. Chlorine-containing products must never be mixed with acids, ammonia, or other cleaners because hazardous gases or reactions can result. Hydrogen peroxide products also vary widely in concentration, so internet recipes are not substitutes for product directions.
Material compatibility matters. Some oxidizing disinfectants can shorten the life of seals, soft tubing, metals, and sensors, while heat can deform plastic parts. Remove pH and conductivity probes unless their manufacturers explicitly permit exposure to the selected cleaner. Clean probes using their approved maintenance procedures and recalibrate them afterward rather than scrubbing delicate sensing surfaces.
After the required contact period, rinse as directed and refill with plain water. Run the pump long enough for rinse water to reach every return, channel, and emitter, then drain again. Check for residual odor, foam, loosened debris, and blocked outlets. If contamination was extensive, a second physical inspection is more valuable than automatically adding another chemical dose. Persistent film indicates incomplete cleaning, not a need to conceal it with stronger nutrients or beneficial inoculants.
Growers sometimes try to preserve beneficial microorganisms during an outbreak. That tradeoff is rarely sensible when the contaminant is unknown and plants are deteriorating. A decisive reset sacrifices the existing microbial community but provides a cleaner baseline. If a biological root-zone product will be used later, introduce it only after disinfectant residues are gone and according to the product directions; oxidizers and living inoculants used together can work against each other.
Restart Safely and Prevent a Repeat Event
A safe restart begins with clean source water and a conservative nutrient mix, not with the immediate restoration of every additive. Fill the sanitized system, confirm that no cleaner remains, and circulate plain water while inspecting for leaks, uneven flow, trapped debris, and malfunctioning aeration. Once the hydraulic path is sound, mix nutrients in the correct order and dilute each concentrate separately.
Measure source-water conductivity before adding fertilizer so the final reading has context. Adjust the finished solution according to the crop, growth stage, water chemistry, and nutrient manufacturer’s directions. Avoid chasing pH minute by minute after mixing; freshly prepared solution may need circulation before readings stabilize. Repeated additions of acid and base can raise dissolved salt levels and obscure the original problem.
Reintroduce plants selectively. Firm, odor-free roots with active pale tips are better candidates than plants with widespread soft tissue or a collapsing crown. Keep visibly compromised plants isolated if possible. During the first day, inspect flow and roots more often than usual, then track pH, conductivity, solution temperature, water use, and plant posture over the following days. Stable readings, clean surfaces, normal water uptake, and new root growth suggest recovery. Renewed odor, rapid pH movement, accumulating foam, or fresh slime indicates that a reservoir branch, plant, or component may still be contaminated.
Prevention focuses on closing the routes by which organic matter and unwanted organisms enter the solution. Exclude light from reservoirs and channels to restrict algae. Keep lids fitted, remove fallen leaves promptly, and prevent growing media from washing into returns. Use clean tools for each system, quarantine new plants, and avoid placing hose ends or measuring equipment on the floor before they contact the reservoir.
Routine records make subtle changes easier to recognize. Note pH, conductivity, temperature, water additions, nutrient batches, cleaning dates, and unusual observations at consistent times. A small conductivity increase caused by plant water uptake is different from an abrupt rise immediately after mixing. Likewise, gradual biofilm accumulation calls for maintenance, while sudden odor and widespread root softening justify immediate containment.
Preventive sterilization should not become indiscriminate chemical dosing. Continuous oxidizer use may conflict with biological products, stress roots at excessive concentrations, or damage equipment. Choose either a biologically managed root zone or an oxidizer-based program with compatible products and clear operating instructions rather than alternating methods without a plan. A written procedure for how to deal with nutrient solution contamination should identify who isolates the system, where solution is discharged, which cleaner is approved, and which components must be replaced.
Frequently Asked Questions
Can contaminated nutrient solution be saved?
A measured, noninfectious error may be correctable, but solution with slime, decay, strong odor, unknown chemicals, or widespread root damage is usually safer to discard than reuse.
Does cloudy nutrient solution always indicate bacteria?
No. Cloudiness may come from mineral precipitation, media dust, microbial growth, or incompatible additives. Examine odor, root texture, recent inputs, pH, and conductivity before deciding.
Should affected roots be cut off?
Small amounts of loose dead tissue may be removed with sanitized tools, but extensive soft or foul-smelling roots often indicate a plant that should be isolated or discarded.
Can bleach be used to sanitize a hydroponic system?
An appropriately labeled chlorine-based product may be suitable for some empty systems. Follow its label, verify material compatibility, rinse as directed, and never mix it with acids, ammonia, or other cleaners.
When can plants return to the cleaned system?
Return suitable plants after cleaner residues are gone, fresh solution is correctly mixed, circulation and aeration are stable, and the roots are firm enough to justify keeping.
Conclusion
Fast containment protects more of the crop than an uncertain attempt to preserve a questionable reservoir. Document the evidence, separate affected equipment and plants, and distinguish a measurable nutrient error from decay, biofilm, or unknown chemical exposure. Drain when the risk cannot be quantified, remove organic debris before applying any disinfectant, and include pumps, lines, emitters, tools, and sensors in the sanitation plan.
Restart with plain-water circulation checks followed by a simple, freshly mixed solution. Watch root texture, odor, flow, pH, conductivity, temperature, and water uptake closely enough to catch recurrence before it spreads. Once conditions stabilize, address the original entry route—light leakage, poor hygiene, warm stagnant water, contaminated plants, mixing mistakes, or inaccessible equipment—rather than relying on repeated chemical treatment.
Further Reading
Authoritative Sources
- Managing Nutrient Deficiencies and Toxicities in ...
kryzen.com1. Diluting the Nutrient Solution ... If nutrient levels become too high, it is crucial to dilute the nutrient solution with fresh water. This helps to rebalance ...
- Nutrient disinfection (Disease prevention) in hydroponic ...
flairform.comTo preventdisease ingress, the nutrient solution, medium and roots should be regularly sterilized. 'Sterilizing agents' must yield a 'residual' chemical