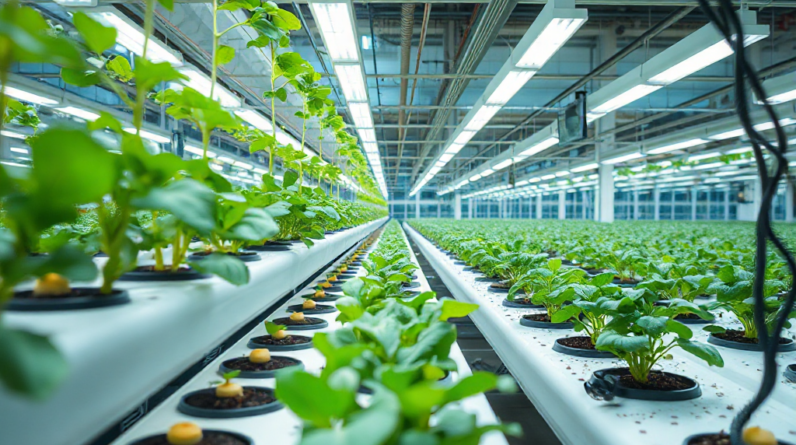
Resetting a hydroponic system between crops means removing old roots and media, washing reservoirs and plumbing, sanitizing surfaces, rinsing thoroughly, and checking pumps and air equipment before mixing fresh nutrient solution. The reset matters because biofilm, plant debris, algae, salt deposits, and lingering pathogens can remain in dark tubing or fittings after harvest. Disassemble what you can, scrub first, use a manufacturer-approved sanitizer at its labeled strength, respect contact time, and rinse until no residue remains. Inspect for clogged emitters, cracked lines, and weak aeration before planting again. A quick drain-and-refill may save time, but it is a poor substitute after disease, heavy algae, or a crop with extensive root decay.
When a Full Crop-to-Crop Reset Is Necessary
A crop change is the best opportunity to remove material that normal water changes cannot reach. Harvested roots break apart in channels, net pots, and return lines; nutrient salts dry around fittings; and algae may persist where light reaches a thin film of moisture. Those residues alter the next crop’s starting conditions and can shelter organisms that were associated with root decline or leaf disease.
A full reset is especially sensible after root browning, foul odors, unexplained wilting, heavy algae, insect infestations, or a spill involving contaminated plant material. It is also worthwhile when moving from a long-lived fruiting crop to delicate seedlings. A mature tomato or pepper may leave more roots and organic debris than a short lettuce cycle, while seedlings have less tolerance for unstable water chemistry and dirty propagation hardware.
Not every harvest requires the same level of disruption. A clean, closely spaced lettuce succession in a well-maintained deep-water system may need a practical cleanout between batches rather than aggressive dismantling of every permanent support. By contrast, a disease-affected crop justifies replacing porous media, removing dead roots, and cleaning components individually. The weak assumption is that clear water means a clean system; biofilm can be nearly invisible, and a reservoir can look acceptable while tubing remains coated.
Before draining, photograph tubing connections and label lines if the layout is complicated. Record the previous crop, any symptoms, and the date of the reset. That small record helps distinguish a one-time equipment problem from a recurring sanitation failure. For broader maintenance context, connect this work with Resetting a hydroponic system between crops as part of a repeatable crop-turnover routine.
The Cleaning and Sanitizing Sequence
Physical cleaning must come before sanitizing because organic debris and mineral scale can shield surfaces from a sanitizer. First remove plants, roots, clips, net pots, loose media, and screens. Drain the reservoir completely, then wipe or scrape deposits from accessible surfaces using a non-abrasive pad. Flush channels and lines with clean water so loosened debris does not settle in a pump or emitter.
Disassemble removable parts rather than assuming circulation reaches every internal surface. Check valve seats, elbows, air-stone fittings, drain screens, and the underside of reservoir lids. A small brush can expose trapped roots that a flushing cycle leaves behind. Keep electrical equipment dry unless the manufacturer specifically allows submersion, and disconnect power before handling pumps or air equipment.
After washing, apply a sanitizer suitable for the system materials and follow its product label for dilution, contact time, ventilation, and handling. Avoid mixing cleaning chemicals. Some growers use a mild peroxide-based product, while others choose a commercial sanitizer intended for horticultural equipment; the appropriate choice depends on label directions and compatibility with plastics, seals, tubing, and air stones. Do not improvise a concentrated mixture because stronger is not automatically safer or more effective.
Allow the solution to contact the reservoir, channels, and plumbing for the required period. Circulation can help expose internal tubing, but it does not replace brushing visible buildup. Drain the sanitizer, rinse with clean water, and repeat the rinse if odor or residue remains. Porous items such as used grow media and certain air stones are difficult to clean reliably after a disease event, making replacement a more dependable option than trying to salvage them.
A useful sequence is:
- Remove crop material and discard questionable roots or media.
- Wash away debris and scale before applying sanitizer.
- Sanitize the reservoir, channels, plumbing, tools, and reusable pots.
- Rinse thoroughly and let components drain or dry where practical.
The common failure is rushing from harvest directly to a chemical treatment. That approach may leave organic matter behind and gives the next crop a falsely clean starting point. Cleaning also protects the sanitizer from being consumed by debris before it contacts the actual equipment surface.
Inspecting Equipment Before Replanting
Sanitation does not correct mechanical weaknesses, so inspect the system while it is empty. A pump with reduced output, a partially blocked return line, or a leaking bulkhead can create uneven water delivery after replanting. Check that water moves through every channel or emitter at the intended rate and that the return path does not back up when several lines operate together.
Examine tubing for cloudy sections, kinks, brittle ends, algae staining, and soft spots around barbed fittings. Replace a short damaged section rather than forcing a tired tube back onto a connector. Inspect gaskets and seals for swelling or flattening. A small leak may not be obvious during a short test, yet it can lower the reservoir level enough to expose a pump intake later in the crop.
Air equipment deserves its own check. Rinse reusable air stones according to their design, look for uneven bubbling, and replace stones that remain restricted after cleaning. Confirm that airline tubing has no pinches and that check valves are oriented correctly. Strong bubbling is not the only goal; consistent aeration throughout the reservoir matters more than a dramatic plume at one outlet.
Consider a simple water-only test before adding nutrients. Fill the reservoir, run the pump, and watch the system through a complete circulation cycle. Look for stagnant corners, splashing that could wet plant crowns, low points where debris collects, and return flow that changes as the reservoir level falls. In a small recirculating setup, a five-minute observation may reveal a loose fitting; in a larger installation, allow enough time for all lines to show their normal behavior.
Replacing everything is not always the best answer. Durable plastic channels and reservoirs can often be reused after thorough cleaning, while cracked fittings, permanently stained soft tubing, exhausted filters, and porous media are more economical to replace. The practical decision weighs cleaning reliability against the cost of a crop failure. If the prior crop had severe root disease, saving a low-cost porous component may expose the entire new planting to unnecessary risk.
For equipment-specific decisions, see Resetting a hydroponic system between crops alongside the pump, air, and plumbing checks used in your particular layout.
Refilling, Testing, and Avoiding Cross-Contamination
Once the hardware is clean and functional, refill with fresh water and prepare a new nutrient solution according to the crop and product instructions. Do not carry the previous reservoir’s nutrient concentration into the next crop by topping it off. Different plants remove nutrients at different rates, and a residual solution may have an unsuitable balance even when its measured electrical conductivity appears familiar.
Measure the source water and finished solution with calibrated meters, then verify pH and conductivity after the nutrients are fully mixed. These readings are starting points, not proof that the reset succeeded. Observe water temperature, reservoir level, pump intake, and return flow during the first hours after planting. Seedlings placed into a freshly cleaned system can still struggle if roots are buried too deeply, aeration is weak, or the solution is mixed too strong for their stage.
Keep clean equipment separate from dirty harvest tools. Wash hands or change gloves after handling discarded roots, and do not place used net pots or pruning tools on the sanitized reservoir lid. Store dry components where dust and splash cannot reach them. If one system has a known disease issue, service it after unaffected systems rather than moving tools and hoses in the opposite direction.
Watch for signs that the reset was effective: the reservoir remains free of floating debris, lines deliver evenly, odors stay neutral, and pH does not behave erratically because of decomposing material. Warning signs include recurring slime, unexplained cloudiness, blocked emitters, root discoloration, or a musty smell soon after startup. Those symptoms call for investigation rather than repeated blind chemical dosing. Check light exposure, temperature, oxygenation, source water, and plant material as well as cleaning quality.
Sanitizing after every minor harvest can waste water and wear components, while skipping a reset after disease can cost an entire planting. A sensible decision framework is to match the intensity of the reset to the previous crop’s condition, the next crop’s sensitivity, and the system’s ability to be fully drained and inspected. A documented reset checklist makes that judgment repeatable without turning every crop change into unnecessary maintenance. Related planning considerations are covered in Resetting a hydroponic system between crops.
Further Reading
For additional research, consult university extension resources on hydroponic sanitation, water management, and plant disease prevention, plus the label and technical documentation for any sanitizer or nutrient product used in the installation. Product instructions are the controlling source for dilution, material compatibility, contact time, and required rinsing.
Frequently Asked Questions
Do I need to clean the reservoir between every crop?
A full clean is prudent between crop cycles, especially after disease, root decay, algae, or heavy debris. A healthy short-cycle succession may need a lighter service only when the equipment remains clean and the next crop is compatible.
Should I sanitize before or after scrubbing?
Scrub and rinse first. Debris and mineral deposits can shield surfaces from sanitizer, reducing contact with the areas that need treatment.
Can I reuse grow media after a diseased crop?
Porous media may retain roots and organisms that are difficult to remove. Replacing inexpensive media is generally more reliable after a serious disease event than attempting to disinfect it.
Is draining and refilling enough?
It removes old solution but not necessarily biofilm, roots, scale, algae, or contaminated residue in plumbing. Use a complete cleaning process when those materials are present.
What should I check before adding new plants?
Test for leaks, confirm pump and return flow, inspect emitters and air stones, verify meter calibration, and mix fresh nutrients at a concentration suited to the new crop and its growth stage.
Further Reading
Authoritative Sources
- Academy of Nutrition and Dietetics
eatright.orgProfessional nutrition guidance, healthy eating resources, and practical dietitian-reviewed advice.
- U.S. Department of Agriculture
usda.govOfficial food, nutrition, agriculture, and consumer guidance from the USDA.
- NIH Office of Dietary Supplements
ods.od.nih.govResearch-based fact sheets on nutrients, supplements, dietary intake, and safety considerations.
- International Society of Sports Nutrition
sportsnutritionsociety.orgEvidence-informed sports nutrition resources and position stands for active people and athletes.
Conclusion
A successful crop-to-crop reset combines debris removal, surface cleaning, appropriate sanitation, thorough rinsing, and a water-only equipment test. Give extra attention to hidden plumbing, pump intakes, return screens, air stones, and porous materials because those areas are easy to overlook and difficult to judge from the reservoir alone. Match the effort to the previous crop’s condition: routine maintenance may suit a clean succession, while disease or root decay calls for deeper disassembly and selective replacement. Before replanting, record what you found, confirm even circulation, and prepare a fresh solution for the incoming crop rather than relying on leftover nutrient water. Those steps create a cleaner starting point and make any later plant problem easier to diagnose.